 Sale
Sale
Woodland Rabbit Intarsia Pattern
Original price was: $20.00.$9.99Current price is: $9.99.
Build a Woodland Rabbit Intarsia Pattern with printable templates, wood guidance, cutting, shaping, assembly and finishing instructions.
Digital ProductNo physical shipping
Secure CheckoutProcessed by WooCommerce
Workshop ReadyReview product details below
Pattern details
Project Specifications
Key details taken directly from this product's WooCommerce attributes.
Skill Level
Beginners
About this pattern
Pattern Description
Read the complete product information before purchasing.
Woodland Rabbit Intarsia Pattern
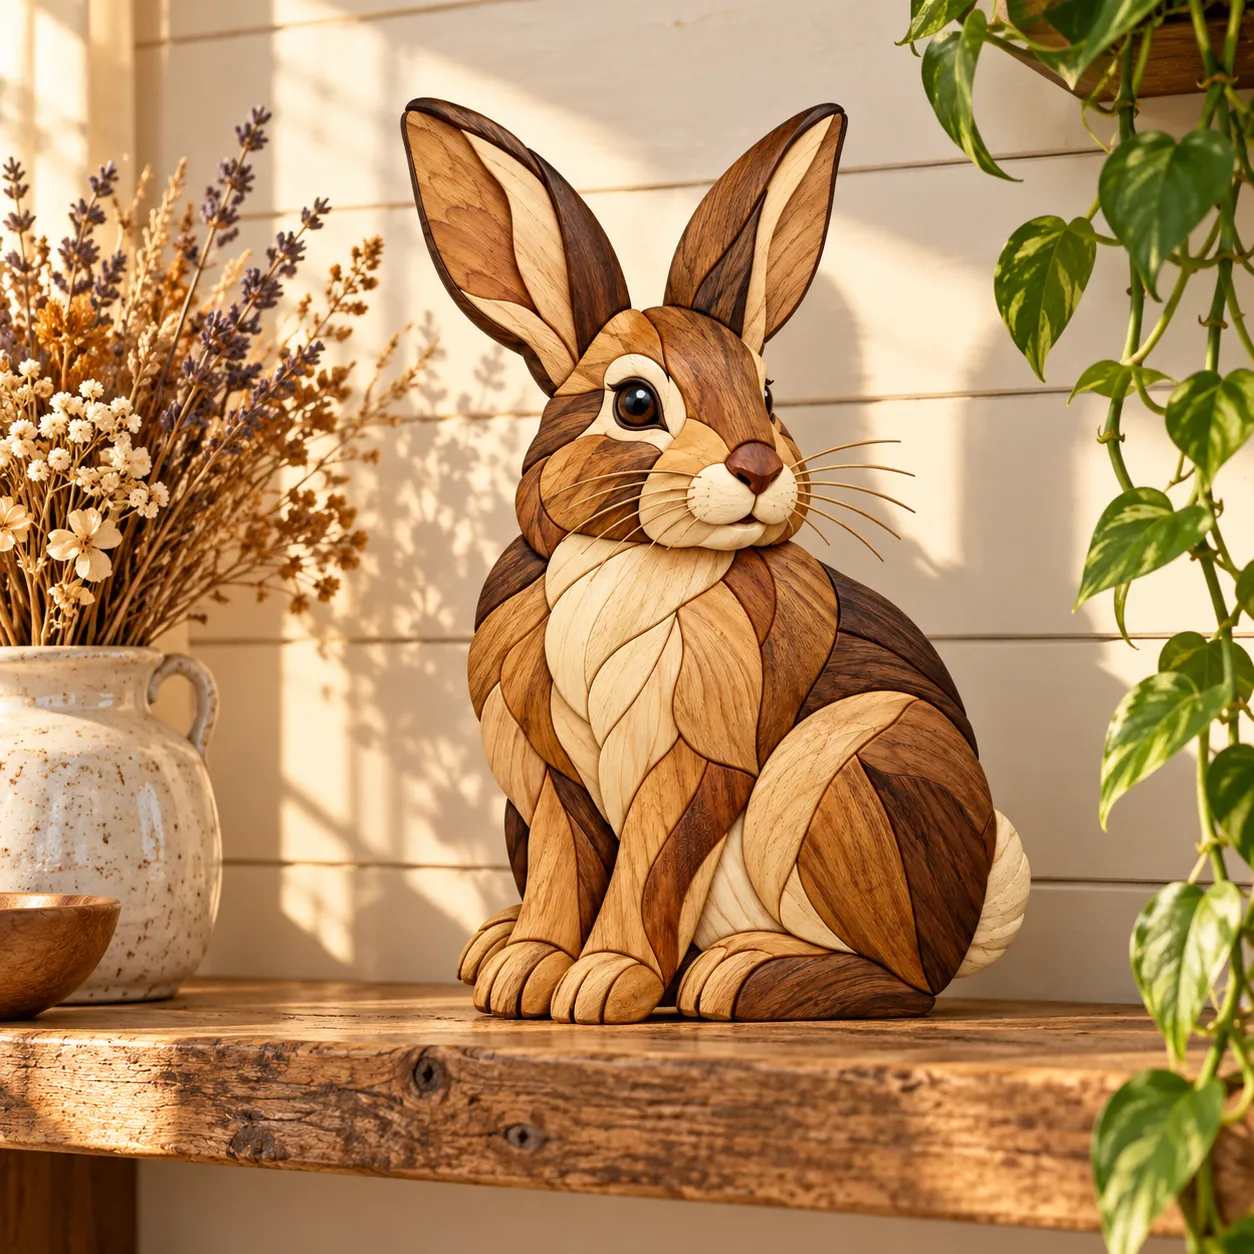
Create a warm, dimensional woodland animal project with the Woodland Rabbit Intarsia Pattern. This digital woodworking pattern and complete beginner guide is designed to help you turn contrasting natural woods into a detailed sitting rabbit with tall ears, expressive eyes, rounded cheeks, layered chest fur, front paws, a curved hindquarter and a small light-colored tail.
Instead of relying on paint to create the rabbit’s appearance, this design uses natural wood color, grain direction and carefully shaped relief. Cream, honey, golden brown, reddish brown and dark walnut tones work together to create depth and definition while preserving the traditional character of intarsia woodworking.
The recommended master project measures approximately 16 inches high by 11 inches wide, not including the whiskers. The guide also explains how to resize the complete design while keeping the height and width proportional.
Woodland Rabbit Intarsia Pattern for Scroll Saw Woodworking
The Woodland Rabbit Intarsia Pattern is designed as more than a basic printable outline. It guides you through the complete process of preparing, cutting, fitting, shaping and assembling a dimensional rabbit from individual pieces of hardwood.
The project is divided into seven manageable areas: ears, head, face, chest, front legs, hindquarter and tail. Breaking the rabbit into modules makes the pattern easier to organise and helps prevent small fitting errors from affecting the entire project.
For the standard 16-inch version, the guide recommends approximately 3/4-inch hardwood for the main visible pieces and a 1/4-inch Baltic birch plywood backer. Selected facial and body areas can use thicker material when stronger dimensional relief is desired.
What Is Included With the Woodland Rabbit Intarsia Pattern?
The Woodland Rabbit Intarsia Pattern includes a complete beginner-focused woodworking guide with:
- Printable Woodland Rabbit pattern and layout reference
- Approximately 16 × 11 inch master project size
- Instructions for resizing the pattern
- Wood selection and color-planning guidance
- Grain-direction recommendations
- Materials and tool guidance
- Pattern transfer and piece-labeling instructions
- Scroll saw cutting techniques
- Dry-fitting guidance
- Shaping and relief instructions
- Ear construction guidance
- Head, forehead and crown shaping
- Eye and facial-detail instructions
- Muzzle, nose and mouth construction
- Whisker installation guidance
- Layered chest-fur shaping
- Front leg, paw and toe instructions
- Hindquarter and rear-foot construction
- Tail shaping
- Sanding schedule
- Modular assembly and glue-up guidance
- Backer-board preparation
- Finishing recommendations
- Troubleshooting guidance
The included wood plan encourages natural contrast. Pale woods such as basswood or hard maple can be used for cream areas, while maple, birch, beech, alder and cherry can create warmer sections. Walnut and black walnut work well for darker areas, with very dark wood reserved for details such as the eye and nose.
Woodland Rabbit Intarsia Pattern Grain and Fur Direction
Grain direction plays an important role in making this Woodland Rabbit Intarsia Pattern look natural. The ears use grain that flows toward the tips, while the forehead grain travels down toward the nose. Chest pieces use longer downward grain to suggest layered fur, and the broad hindquarter can use curved grain to emphasize its rounded shape.
This grain planning helps separate the project from a simple flat wooden puzzle. Combined with shaping, it allows each piece to contribute to the rabbit’s anatomy and visual flow.
Add Dimensional Relief to the Woodland Rabbit Intarsia Pattern
The Woodland Rabbit Intarsia Pattern is designed to create raised, sculptural wall art. The guide explains how to shape individual pieces with gentle convex surfaces rather than leaving every section flat.
The body, chest and legs use medium relief, while important facial areas such as the brow, cheeks, muzzle and nose can sit higher. The hindquarter is also shaped into a broad rounded mass so the finished rabbit has a convincing seated posture.
Beginner-Friendly Woodland Rabbit Intarsia Pattern Workflow
Beginners are encouraged to complete a full dry fit before heavy shaping or glue-up. The larger body pieces are positioned first, followed by the head, ears, legs, hindquarter and facial details. This allows gaps and alignment problems to be corrected while changes are still easy. Woodland_Rabbit_Intarsia_Beginn…
If you are new to this type of woodworking, visit our Intarsia for Beginners guide before starting. You can also learn more about the technique in our What Is Intarsia guide.
Printable Woodland Rabbit Intarsia Pattern
The pattern can be printed at the master size or resized uniformly for different projects. The guide includes examples for approximately 10, 12, 16, 20, 24 and 30-inch-high versions, with recommended stock thickness changing as the project becomes larger.
Who Is the Woodland Rabbit Intarsia Pattern For?
This Woodland Rabbit Intarsia Pattern is ideal for beginner intarsia makers, scroll saw woodworkers, rabbit lovers and makers who enjoy nature-inspired woodworking projects.
The finished rabbit can make attractive woodland wall decor, nursery-inspired decor, farmhouse decor, Easter-season display art or a handmade gift for someone who loves rabbits and woodworking.
Browse more intarsia patterns in our shop if you want to build additional animal and wildlife projects.
Important Woodland Rabbit Intarsia Pattern Information
This listing is for a digital Woodland Rabbit Intarsia Pattern and beginner build guide. No finished wooden rabbit, timber, tools, frame or other physical product will be shipped.
Natural grain, wood species and individual shaping techniques will make every finished project slightly different. Please also review our Digital Product License for permitted use of downloaded files.
Simple purchase flow
From Pattern to Workshop
01
Choose Your Pattern
Review the product details, images and specifications.
02
Checkout Securely
Use the Card or PayPal purchase button to open the secure checkout for this pattern.
03
Access Your Purchase
Follow the instructions shown after successful payment to access your digital purchase.
04
Start Creating
Prepare your wood and begin your intarsia project.