

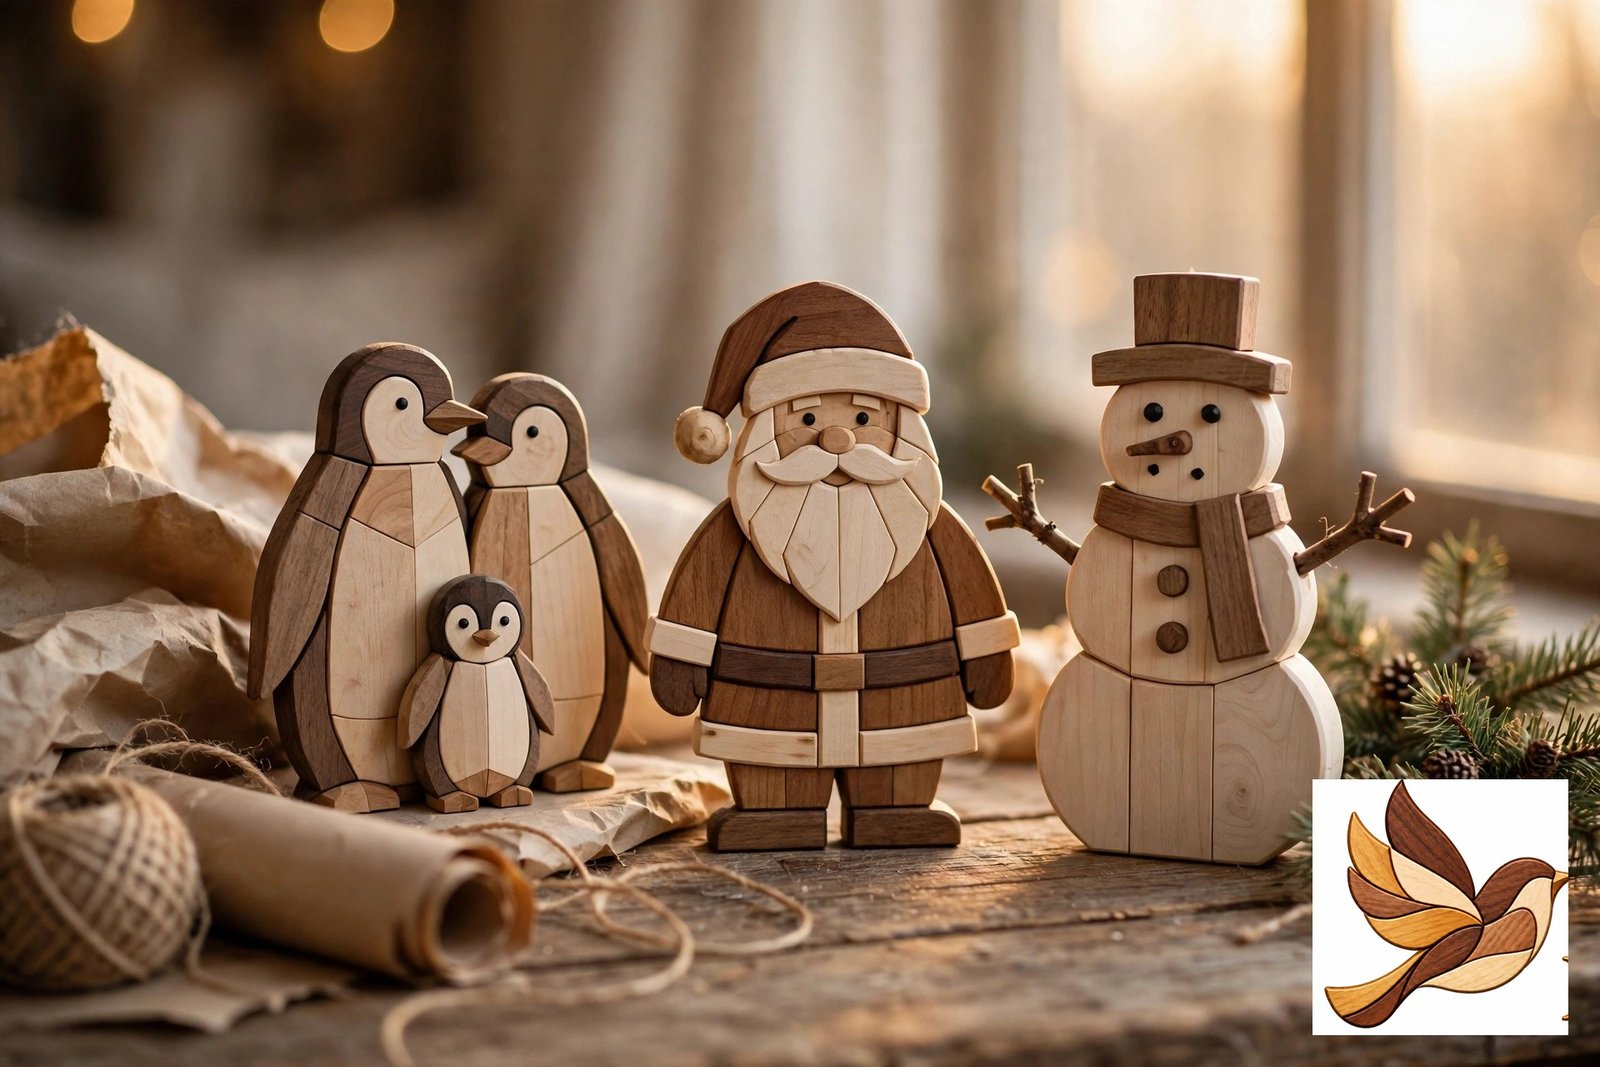
Every year, the same problem: you want to give something personal, but the shops are full of the same mass-produced gifts everyone else is buying. If you own a scroll saw, you already have the answer sitting in your workshop. Intarsia Christmas gifts — pictures built from fitted pieces of natural wood, with no paint and no stain — are the kind of present people keep on their wall for decades, not the kind that ends up in a drawer by January.
This guide walks through the best intarsia Christmas gifts you can make this year, who each one suits, how long they take, and how to finish and wrap them so they look like they came from a gallery, not a garage. If you are new to the craft, start with our Intarsia for Beginners guide first — then come back and pick your project.
Why Intarsia Christmas Gifts Make Such Good Presents
A handmade intarsia piece hits three things bought gifts rarely manage at once. It is personal — you chose the subject for that specific person. It is lasting — solid wood on a plywood backer does not date, break down or go out of fashion. And it is honest craft — every colour in the picture is the natural colour of a real wood species, so no two pieces ever look exactly alike. A walnut from your offcut bin will be a slightly different brown from anyone else’s walnut, which means the gift you make is genuinely one of one.
5 Intarsia Christmas Gifts to Make This Year
1. Christmas Penguin Family — for new parents and grandparents
A penguin pair with their chick, dressed in scarves and hats, is the sweetest family-themed piece in our Holiday and Seasonal collection. It is a natural gift for a couple’s first Christmas with a baby, or for grandparents who collect family pieces. The Christmas Penguin Family pattern has around 70 pieces — a satisfying weekend-plus project for an intermediate maker, with bold shapes that forgive small cutting errors.
2. Santa in Chimney — for kids and the young at heart
Some gifts are for hanging in the hallway every December for the next thirty years. The Santa in Chimney pattern shows Santa disappearing down the chimney with his sack — a funny, warm design children point at every single year. It suits confident beginners: the shapes are chunky, the wood list is short, and the red of Santa’s suit comes from bloodwood or padauk, so the colour will never fade like paint.
3. Snowman with Cardinal — for winter décor lovers
Not everyone wants Santa on their wall — but almost everyone loves a snowman. The Snowman with Cardinal pattern pairs a cheerful snowman with a bright red cardinal, and because it is a winter scene rather than a Christmas-only one, the recipient can display it from November to February. It makes an especially good gift for neighbours, teachers and hosts — the people you want to thank without going over the top.
4. Christmas Tree — the quick gift that still looks impressive
Short on weekends? The Christmas Tree pattern is the fastest make on this list: a layered tree with ornaments that most makers finish in one or two evenings. Make it at a smaller size and it becomes a tree ornament or a stocking gift; make it full size and it is a mantel piece. This is also the design we recommend if you want to make several gifts from one pattern — cut three at once by stack-cutting, and three presents are done in an afternoon. If you enjoy making wooden ornaments, Popular Woodworking’s Christmas ornament ideas are worth a look too.
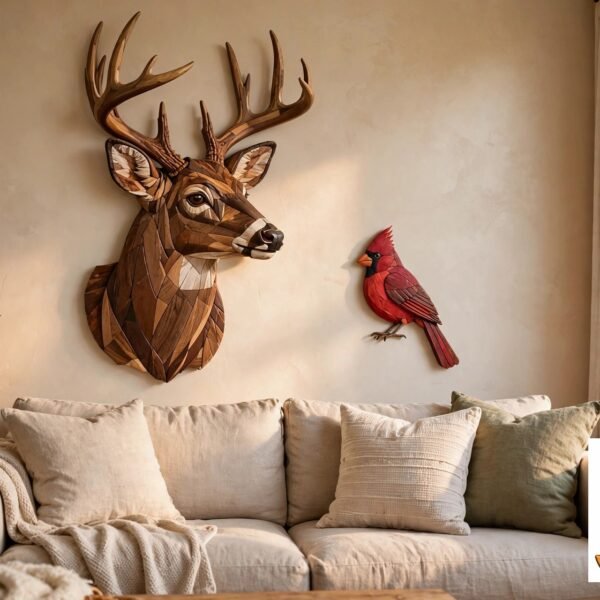
5. Cardinal on a Branch — for the bird lover in the family
Cardinals mean Christmas in much of North America, and they carry a lovely meaning too — many families see a visiting cardinal as a reminder of a loved one. The Cardinal on a Branch pattern is one of our most gifted intarsia Christmas gifts all year round. The bird’s red comes from naturally red wood, the branch gives you beautiful grain work to show off, and it hangs just as happily in July as in December.
How Long Do Intarsia Gifts Take? A Realistic Timeline
Plan backwards from when your intarsia Christmas gifts need to be wrapped:
- Simple designs (under 40 pieces): 3–6 hours total — cutting one evening, shaping and gluing the next.
- Medium designs (40–80 pieces): 8–14 hours spread over two or three weekends.
- Large designs (80+ pieces): start a month ahead and work in short sessions — intarsia rewards patience and punishes rushing.
Add one extra day at the end for finishing and drying. Our guide to how to finish intarsia covers the sanding, shaping and oiling steps that take a piece from “nice” to “gift quality” — do not skip the finish on a gift; it is the difference the recipient can feel with their fingertips.
Which Woods Give You Christmas Colours — Without Paint
One of the loveliest things about intarsia Christmas gifts is that every colour in the picture is the wood itself, so it helps to know which species give you the colours you need. For deep browns and dark outlines, walnut is the classic choice; for warm red-browns, cherry darkens beautifully with age. Pale woods carry the snow scenes: maple and holly are almost white, while aspen gives a soft cream. The bright reds of Santa’s suit and a cardinal’s feathers come from bloodwood or padauk, and a touch of yellowheart makes a star or a candle flame glow. Dark details — eyes, outlines, a chimney pot — are usually wenge or ebony offcuts.
Pay attention to grain direction too: running the grain along a scarf or a branch makes intarsia Christmas gifts look far more lifelike than grain running across them. A penguin’s belly reads better with vertical grain, a tree branch with grain running along its length, and a Santa hat with the grain following the curve of the brim. Spend a minute rotating each piece on the pattern before you cut — the grain is free, and it is the detail that makes people lean in closer.
You do not need a timber merchant’s catalogue to start. Most intarsia makers build a small box of offcuts in these basic colours and reach for it every Christmas. Buy a few small boards in the species above, cut them into gift-sized pieces, and label them — next December, choosing wood for intarsia Christmas gifts becomes the easiest part of the work.
If you are buying specially, ask for shorts and offcuts rather than full boards: intarsia uses small pieces, and offcut bins are far cheaper than buying a whole board of bloodwood for one Santa hat. Let new wood rest in your workshop for a few days before cutting, so it settles to the same temperature and humidity as the room where the finished piece will hang.
Presentation: Make It Look Like a Gallery Piece
Sign and date the back. A short line on the backer — your name, the year, and who it is for — turns intarsia Christmas gifts into keepsakes. This takes two minutes with a fine marker or a wood-burning pen.
Attach the hanger before wrapping. Fit a sawtooth hanger or D-rings to the backer so the gift can go straight onto the wall on Christmas morning.
Wrap it flat and rigid. Intarsia is sturdy, but thin antlers, beaks and tails can snap under point pressure. Sandwich the piece between two sheets of stiff cardboard inside the wrapping paper, and never stack heavy parcels on top of it.
Add a card that tells the story. One or two lines — “Made from walnut, cherry and maple; the colours are the natural wood, no paint” — helps the recipient understand what they are holding. Most people have never heard of intarsia, and the story is half the gift.
That little note is part of what makes intarsia Christmas gifts feel so personal — the recipient knows the piece was made for them, not bought off a shelf.
A Quick Checklist Before You Start Cutting
Intarsia Christmas gifts reward a little preparation, and a short checklist saves more time than it takes. Print the pattern at full size and check the scale against a ruler before you cut anything. Lay out your wood pieces and number them to match the pattern map, so you are never hunting for piece 37 halfway through a glue-up. Fit a fresh scroll saw blade — a dull blade wanders, and wandering cuts are the main reason pieces stop fitting together neatly.
Cut the backer to size before you start shaping, and keep the pieces in order as you cut them: a baking tray with the pattern map underneath makes a good sorting tray. Decide on your finish before you glue anything down, and test it on an offcut of each wood you are using — some oils deepen reds and darken pale woods, and it is better to discover that on a scrap than on a finished gift.
Keep a small brush and a damp cloth on the bench for dust between sanding stages, and photograph the dry layout before you glue — a photo shows gaps and misplaced pieces that your eyes miss at the bench. With the pattern checked, the wood numbered and the finish tested, intarsia Christmas gifts come together calmly instead of in a last-minute rush.
Ready to Start?
Browse the full Holiday and Seasonal pattern collection and pick the intarsia Christmas gifts that match your person — every pattern is an instant PDF download with a numbered map, a cutting schedule and full-size templates, so you can print tonight and start cutting tomorrow. Pick one, make it slowly, and give intarsia Christmas gifts that will still be on their walls when the grandkids visit.

Zaid Hussain
Articles from IntarsiaPattern focus on intarsia woodworking, scroll saw techniques, digital patterns and practical project guidance.


Comments 0
Have a question or something useful to add? Share it below.