

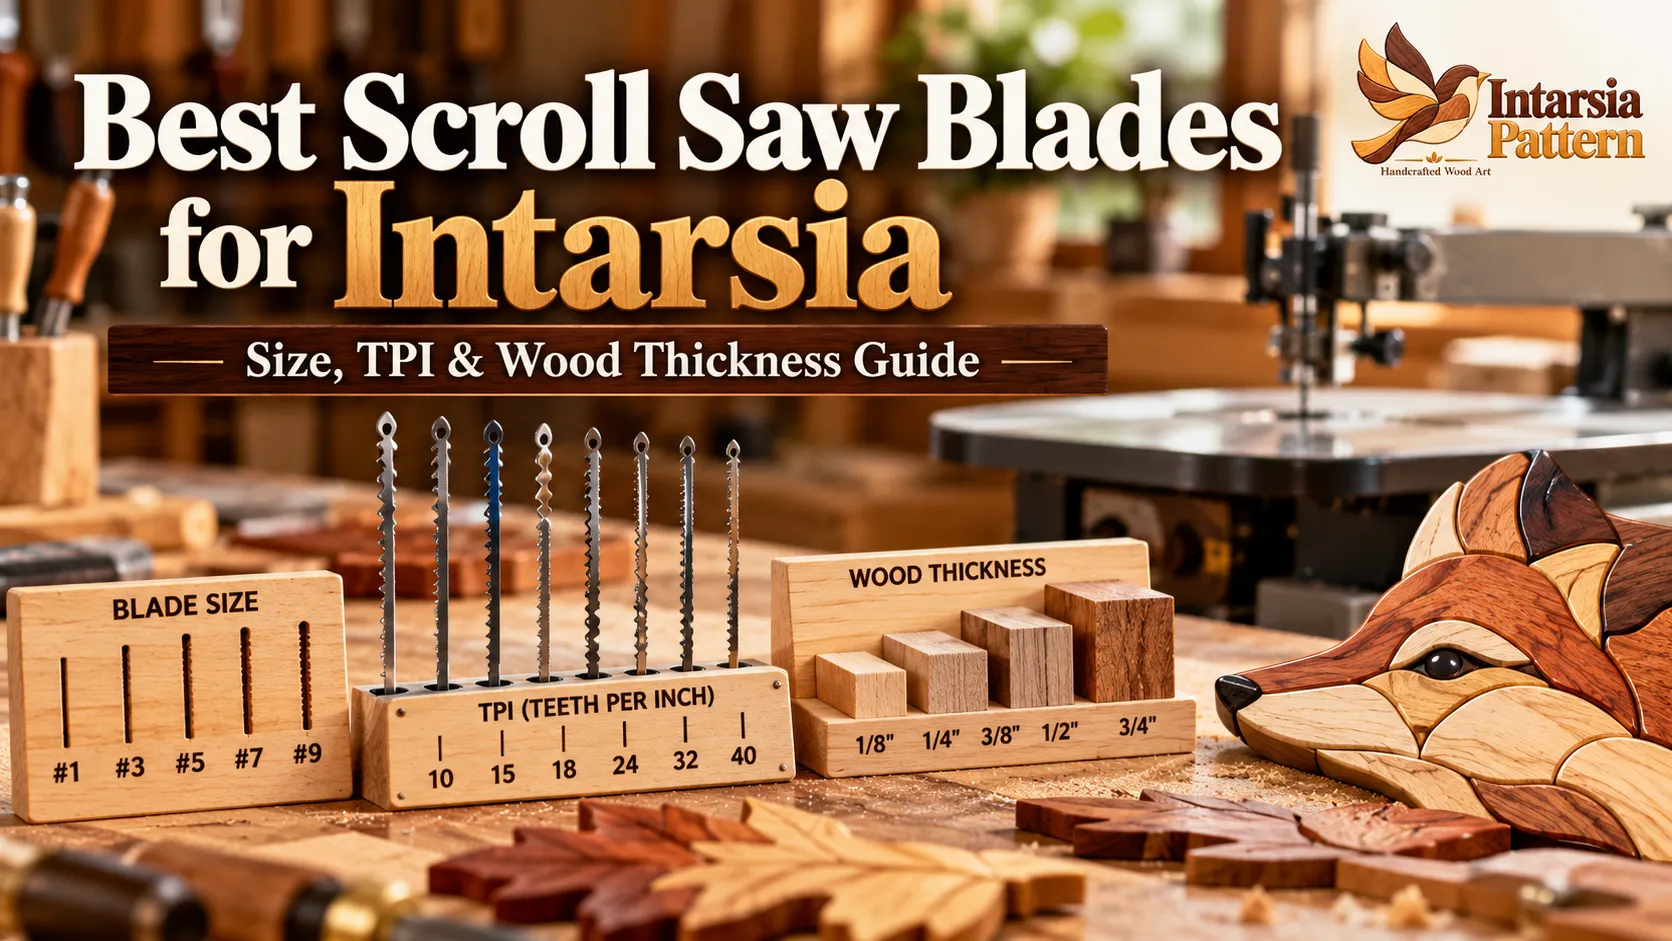
You’ve chosen a beautiful intarsia pattern, picked your favorite wood, and switched on your scroll saw. Everything looks promising until the blade starts wandering, the wood begins to burn, or two pieces refuse to fit together.
Sound familiar?
Sometimes the problem isn’t your cutting technique. It’s the blade you’re using.
Finding the best scroll saw blades for intarsia can make a noticeable difference in how smoothly you cut curves, how accurately pieces fit, and how much cleanup your project needs.
But here’s something many beginners don’t realize: the biggest blade isn’t always the best choice for thick wood, and the smallest blade isn’t automatically better for detailed designs.
Blade size, teeth per inch (TPI), tooth configuration, wood thickness, and grain density all play a role.
This guide will help you choose the right blade for your next intarsia pattern, whether you’re working on a small bird, a detailed animal portrait, or a larger seasonal woodworking project.
Best Scroll Saw Blades for Intarsia: Quick Answer
For many intarsia woodworking projects, a #5 reverse-tooth or modified-geometry scroll saw blade is a good starting point. A #3 blade can provide better control for tighter curves, while #7 or #9 blades may suit heavier cuts in thicker stock.
For narrow internal cuts, a #2/0, #1, or similarly fine blade can reduce the amount of wood removed.
However, the ideal choice depends on wood thickness, density, cutting radius, and blade design.
Start with these general recommendations:
| Cutting task | Blade size to try | Why |
|---|---|---|
| Very fine internal cuts | #2/0 to #1 | Narrow kerf and tight turns |
| Small detailed pieces | #1 to #3 | Better maneuverability |
| General intarsia cutting | #3 to #5 | Good balance of control and cutting speed |
| Medium to thick hardwood | #5 to #7 | Stronger blade options |
| Thick stock with broad curves | #7 to #9 | Faster cutting when appropriate |
These are starting points, not fixed rules. Always compare the manufacturer’s specifications and make a test cut.
Why Blade Selection Matters for Intarsia Woodworking
Intarsia is the art of cutting, shaping, and assembling individual wooden pieces into dimensional artwork.
Unlike many simple scroll saw decorations, adjoining intarsia pieces must fit closely together.
If a blade bends during cutting, the top of a piece may have a different shape from its bottom.
If the blade removes too much material, neighboring pieces may develop visible gaps.
And if your blade is dull, you might push harder than necessary, increasing the risk of burning, rough edges, and inaccurate cuts.
The right blade helps you achieve:
- More accurate cutting along pattern lines.
- Cleaner curves and sharper details.
- Better-fitting neighboring wood pieces.
- Less underside splintering.
- More predictable cutting through hardwood.
- Better control around small or delicate sections.
If you’re new to this woodworking technique, visit our Intarsia for Beginners guide to understand how cutting, shaping, and assembly work together.
Understanding Scroll Saw Blade Sizes
Scroll saw blade sizes usually follow a numbered system.
Common sizes include #2/0, #1, #3, #5, #7, and #9.
In general, a larger number means a wider, more robust blade, but exact dimensions vary between manufacturers and blade series.
Small Blades: #2/0, #1 and #3
Smaller blades are useful for detailed intarsia cutting.
They can follow tighter curves and make narrower cuts than many larger blades.
For example, you may need a fine blade when cutting the gap between a bird’s wing and body or separating small sections within an animal portrait.
However, narrow blades can be more sensitive to excessive pressure and may not be the most comfortable choice for every thick hardwood.
Medium Blades: #5
A #5 blade is one of the most useful starting sizes for general scroll saw woodworking.
It can handle many common curves while offering enough stability for medium-thickness stock.
For beginners, this often makes it easier to concentrate on following the cutting line instead of constantly changing blade sizes.
If you’re preparing a medium-sized animal or seasonal intarsia pattern, start by testing a #5 blade on an offcut of the actual wood.
Larger Blades: #7 and #9
Larger blades are commonly chosen for thicker stock, larger pieces, and less intricate curves.
Their wider bodies can improve stability during certain cuts.
However, they also make a wider kerf and cannot turn as tightly as narrow blades.
A larger blade is not an automatic solution when cutting becomes difficult.
Sometimes a fresh, sharper, smaller blade will produce a better result with less pressure.
Best Scroll Saw Blades for Intarsia by Wood Thickness
Wood thickness is one of the first things to consider when selecting a blade.
A delicate 1/8-inch wood ornament behaves differently from a 3/4-inch walnut animal portrait.
The thicker the material, the more important chip removal, blade stability, and feed control become.
Scroll Saw Blade Size and Wood Thickness Chart
| Wood thickness | Starting blade sizes | Approximate TPI range to investigate | Typical use |
|---|---|---|---|
| 1/8 inch (3 mm) | #2/0 to #1 | 20–30 | Thin details, delicate fretwork |
| 1/4 inch (6 mm) | #1 to #3 | 12–20 | Small decorative pieces |
| 3/8 inch (10 mm) | #3 to #5 | 11–15 | Small to medium intarsia parts |
| 1/2 inch (13 mm) | #3 to #5 | 10–15 | General woodworking patterns |
| 3/4 inch (19 mm) | #3 to #7 | 9–15 | Common hardwood intarsia |
| 1 inch (25 mm) | #5 to #9 | 8–13 | Larger pieces and thick stock |
These are broad starting ranges, not a manufacturer-approved compatibility chart. Different blade designs can perform well outside these ranges.
Choose according to the specific blade’s specifications, wood species, and test-cut results.
Best Scroll Saw Blades for Intarsia in 3/4-Inch Hardwood
Three-quarter-inch stock is common in dimensional woodworking because it gives makers room to shape and round the front of each piece.
A #3, #5, or #7 blade can all be worth testing.
Suppose you’re cutting a 3/4-inch walnut fox portrait.
A #5 blade may feel comfortable through the broad body sections.
When you reach the narrow curves around the ears or muzzle, a #3 might give you more control.
For a large outer contour, a #7 could be useful if it cuts smoothly without making you force the wood.
Rather than committing to one size for the entire project, test two or three blades using the same species and thickness.
What About Thicker Wood?
For wood approaching or exceeding 1 inch, look carefully at the blade manufacturer’s thickness recommendations.
A #7 or #9 may be an appropriate starting choice for broad cuts, but performance depends on the blade design and wood density.
Keep the feed pressure light.
A blade that struggles through thick hardwood shouldn’t be forced.
Try a fresh blade, adjust the cutting speed, and check the blade tension before assuming you need the largest size available.
What Does TPI Mean on a Scroll Saw Blade?
TPI stands for teeth per inch.
It describes how many teeth are arranged along one inch of blade length.
TPI influences how a blade cuts, clears sawdust, and interacts with different wood thicknesses.
High TPI vs. Low TPI
Higher-TPI blades generally have more closely spaced teeth.
Depending on their design, they may offer finer cutting action on thin materials, but they can also clear sawdust less efficiently when used in thick stock.
Lower-TPI blades typically have more space between cutting teeth, which can help clear chips during heavier cuts.
However, TPI alone does not determine cutting speed or surface quality.
Tooth shape, blade set, sharpness, feed rate, and wood species also matter.
Why TPI Changes Between Blade Brands
Two blades labeled #5 can have different teeth-per-inch counts.
For example, certain Olson #5 skip-tooth blades have approximately 12.5 TPI, while Pegas #5R modified-geometry blades are specified at approximately 11.3 TPI.
The blades may also differ in width, thickness, tooth geometry, and cutting behavior.
That’s why selecting a blade solely by its number can be misleading.
Check the actual specification rather than assuming all #5 blades perform identically.
How Many Teeth Should Contact the Wood?
A common woodworking guideline is to keep roughly three cutting teeth engaged in the material.
This is especially useful when considering thin stock, where teeth that are too widely spaced may grab or chatter.
However, it is only a general guideline.
Reverse-tooth, skip-tooth, and modified-geometry blades use different arrangements, and the number of actively cutting teeth may vary during each stroke.
The best approach is to check the manufacturer’s application recommendations and evaluate the cut.
Best Scroll Saw Blade Types for Intarsia
Blade size is only half the decision.
The arrangement of the teeth also affects control, cutting speed, heat, and splintering.
1. Reverse-Tooth Blades
Reverse-tooth blades contain a section of teeth oriented opposite the main cutting direction.
Those reverse teeth help reduce splintering on the underside of the wood.
This is useful when cutting intarsia pieces because you’ll often want both the front and back edges to remain clean.
Reverse-tooth blades are a practical choice for many general-purpose intarsia cuts.
However, you must position the blade correctly so the reverse teeth work near the underside of the material.
2. Skip-Tooth Blades
Skip-tooth blades have spaces between cutting teeth.
These spaces help remove sawdust from the cutting area.
Better chip clearance can be especially helpful when cutting thicker wood.
For beginners, skip-tooth blades are worth considering when ordinary blades begin heating or clogging.
They may leave a different edge finish depending on the wood and cutting technique.
3. Modified-Geometry Blades
Modified-geometry blades use specialized tooth shapes designed to improve cutting efficiency and control.
Some are available with reverse teeth.
They can perform well in a range of hardwoods and are popular among many scroll saw users.
For general intarsia work, a #3 or #5 modified-geometry blade is a sensible option to test.
The exact performance depends on the manufacturer, blade model, and cutting conditions.
4. Double-Tooth Blades
Double-tooth blades group teeth together with spaces between those groups.
Their design can provide useful chip clearance while producing controlled cuts.
They are worth exploring when you want an alternative to standard or skip-tooth configurations.
5. Spiral Blades
Spiral blades have cutting teeth arranged around the blade, allowing cutting in multiple directions.
This can be useful for specialized patterns.
However, a spiral blade is not usually my first recommendation for accurately fitting straight-sided intarsia pieces.
Maintaining consistent, square mating edges can be harder because the cutting action is different from a conventional flat blade.
For most beginner projects, start with a conventional blade before experimenting with spiral designs.
Which Blade Type Should You Choose?
| Blade type | Main advantage | Considerations |
|---|---|---|
| Reverse tooth | Reduced underside tear-out | Correct blade position matters |
| Skip tooth | Good sawdust clearance | Edge quality varies |
| Modified geometry | Efficient cutting and control | Specifications vary by model |
| Double tooth | Balanced cutting and chip removal | Test on actual wood |
| Spiral | Cuts in multiple directions | Less ideal for precise mating edges |
For your first intarsia project, a small assortment of conventional blades is more useful than buying every specialty blade available.
Understanding Blade Kerf and Why It Matters
Kerf is the width of material removed during cutting.
This becomes important when neighboring intarsia pieces must meet cleanly.
Imagine a pattern that divides a wooden bird wing into several separate pieces.
A wide cut removes more material between the sections.
If the pieces are intended to fit closely together, excessive material loss may create visible gaps.
Blade Thickness vs. Kerf Width
Blade thickness and kerf width are not always identical.
The actual kerf can depend on the blade’s tooth set, cutting movement, and other factors.
Two blades with similar steel thickness may leave different cut widths.
The practical solution is to make a test cut and measure the resulting opening.
Use Fine Blades for Internal Separation Cuts
When separating two adjoining parts within the same piece of wood, a finer blade may help preserve more material.
This is particularly valuable around small faces, feathers, or decorative sections.
However, narrow kerf is not the only goal.
A clean, square cut that follows the pattern accurately is often more important than simply removing the least amount of wood.
You can learn more about the basic construction process in our What Is Intarsia guide.
Best Scroll Saw Blades for Different Wood Species
Wood species can affect how a blade behaves.
Soft, light woods often respond differently from dense hardwoods.
Grain direction and thickness matter too.
Pine, Cedar and Other Softer Woods
Softer woods may cut more easily, but some are prone to splintering or fuzzy edges.
A sharp reverse-tooth blade can help reduce underside tear-out.
Start with a #3 or #5 for ordinary pieces and adjust according to thickness and detail.
Maple and Birch
Maple and birch are commonly used when a light wood color is needed.
Their density varies, and some pieces can be demanding to cut cleanly.
A sharp #3 or #5 blade is a useful starting point for medium-thickness pieces.
Reduce feed pressure if you notice scorching or blade wandering.
Walnut and Cherry
Walnut and cherry are popular intarsia woods because of their natural colors.
For 1/2-inch to 3/4-inch pieces, experiment with #3, #5, and #7 blades.
Choose the blade that follows your curves accurately without excessive pushing.
Very Dense Hardwoods
Dense hardwoods can create more resistance and heat during cutting.
You may benefit from a blade with good chip clearance or a different tooth geometry.
Try adjusting the blade size, speed, and feed pressure instead of assuming a larger blade will always cut better.
If the wood begins to burn, stop and investigate before continuing.
How to Choose the Right Blade for an Intarsia Pattern
A simple selection process can remove much of the guesswork.
Step 1: Look at the Smallest Curve
Study the entire pattern before cutting.
The smallest radius may determine which blade you need for the most delicate pieces.
A large animal portrait can still include tiny details around the eyes, ears, or fur.
Step 2: Check the Wood Thickness
Measure the actual wood stock.
Don’t rely only on the nominal lumber size.
Check the manufacturer’s suggested material range.
Step 3: Consider the Wood Density
A soft 3/4-inch board and a dense 3/4-inch hardwood board may require different cutting approaches.
Have an alternative blade available.
Step 4: Select the Tooth Configuration
Start with reverse tooth or modified geometry for general intarsia cutting.
Try skip tooth when sawdust clearance is an issue.
Use very fine blades for narrow internal details when appropriate.
Step 5: Make a Test Cut
Use an offcut of the actual wood.
Include a straight section and a curve similar to the project.
Compare how the blade handles each part.
Best Scroll Saw Blades for Intarsia: The Five-Minute Test
Before starting a new project, use this quick checklist:
- Install a fresh blade correctly.
- Set blade tension according to your saw’s instructions.
- Confirm the blade is square to the table.
- Cut a gentle curve in scrap wood.
- Check whether the edge is square and the blade follows the line without excessive pressure.
- Inspect the underside for splintering.
- Compare a second blade if the first one struggles.
This short test can prevent wasted wood and difficult fitting later.
How to Stop Scroll Saw Blades From Burning Wood
Burn marks are frustrating, especially when working with valuable hardwood.
They often indicate that the cutting process needs adjustment.
Possible causes include a dull blade, excessive feed pressure, poor chip clearance, or too much friction during tight curves.
Try these corrections:
- Replace the blade if it feels dull.
- Reduce forward pressure.
- Test a different blade size or tooth configuration.
- Adjust saw speed for better control.
- Clear accumulated sawdust.
- Avoid forcing the blade around extremely tight corners.
For some hardwoods, woodworkers use clear packing tape over the cutting line to help reduce friction and scorching.
If you try that technique, make sure it doesn’t interfere with visibility or safe control of the workpiece.
And remember: burning does not necessarily mean you need a larger blade.
Sometimes a smaller, sharper blade cuts more freely.
Why Scroll Saw Cuts Are Not Square
You may finish cutting two intarsia pieces and discover that their front edges appear to fit, but the backs don’t.
This usually means the cut wasn’t square through the wood.
Check the Saw Table
Use an accurate square to verify that the blade is perpendicular to the table.
Make a test cut and inspect the resulting edge.
Check Blade Tension
A loose blade can deflect more easily.
Follow your saw manufacturer’s instructions for correct tension.
Don’t overtighten in an attempt to eliminate every problem.
Watch Your Feed Pressure
Pushing too hard or sideways can bend the blade through the wood.
This may produce a slanted edge.
Guide the wood gently and let the teeth do the work.
Use a Sharp Blade
Dull blades require more effort and may wander.
If cutting feels noticeably harder than it did with a fresh blade, replacement is often the simplest solution.
Accurate cutting is especially important for an intarsia pattern containing many closely fitting sections.
Common Scroll Saw Blade Problems and Solutions
| Problem | Possible cause | What to try |
|---|---|---|
| Wood burns | Dull blade, friction, poor chip clearance | Fresh blade, lighter feed, different tooth type |
| Blade breaks repeatedly | Excess tension, bending, forcing or wrong blade | Check setup and cutting technique |
| Curves look rough | Excess pressure or unsuitable blade | Slow the feed and try a finer blade |
| Cut edges aren’t square | Side pressure, table alignment or blade deflection | Check square, tension and feed |
| Underside splinters | Tooth configuration or material behavior | Try reverse tooth |
| Small parts have wide gaps | Excessive kerf or inaccurate cutting | Test a narrower blade |
| Blade cuts slowly | Dull teeth, dense wood or unsuitable geometry | Replace blade and compare configurations |
| Blade won’t follow tight turns | Blade too wide or wood forced around curve | Try smaller blade and plan relief cuts |
A Simple Starter Blade Kit for Beginner Intarsia Makers
You don’t need an expensive collection to get started.
A practical beginner kit might contain:
- #2/0 or #1 blades for narrow internal cuts.
- #3 blades for smaller details and tight curves.
- #5 blades for general cutting.
- #7 blades for broader cuts in thicker stock.
- A few alternative tooth configurations for comparison.
Choose blades that are compatible with your saw.
Most modern scroll saws use plain-end blades, but some models require pin-end blades.
Check your owner’s manual before buying.
Not all specialty blade sizes are available in pin-end formats.
Keep spare blades in clearly labeled containers so you can identify the size and tooth type quickly.
Practical Examples: Choosing a Blade for Your Next Project
Example 1: Wooden Bird Intarsia
Imagine making a small cardinal with a curved body, detailed wing, and narrow tail.
For medium-thickness wood, a #3 blade could be a good starting point.
Use a finer blade for tiny internal separation cuts if needed.
Focus on keeping the tail and wing edges clean and square.
Example 2: Wildlife Intarsia Portrait
Suppose you’re creating a large bear portrait using 3/4-inch walnut, cherry, and maple.
A #5 blade may handle much of the project.
Switch to #3 for narrower curves.
Try #7 on broad contours if it cuts smoothly without compromising control.
Example 3: Christmas Decoration
A Christmas tree pattern may contain large branches, small ornaments, and delicate star points.
Rather than forcing one blade through every section, separate the project into cutting stages.
Use a general-purpose blade for the larger shapes and a finer blade for small decorative details.
You can explore more wildlife and seasonal designs in the IntarsiaPattern Shop.
Frequently Asked Questions About the Best Scroll Saw Blades for Intarsia
What Are the Best Scroll Saw Blades for Intarsia Beginners?
For many beginners, #3 and #5 reverse-tooth or modified-geometry blades provide a useful balance of control and cutting ability. Add a fine blade for internal details and a #7 for thicker stock.
Is a #5 Scroll Saw Blade Good for Intarsia?
Yes. A #5 blade is a practical starting size for many general intarsia cuts. However, intricate curves may require a smaller blade, while some thick or dense materials may benefit from a different size or tooth configuration.
What TPI Is Best for Intarsia Woodworking?
There is no universal best TPI. General-purpose blades often fall around 10–15 TPI, while very fine blades may have more teeth per inch. Match the actual blade specifications to the wood thickness, density, and smallest curve.
Which Scroll Saw Blade Is Best for 3/4-Inch Hardwood?
A #3, #5, or #7 blade may work well, depending on the wood and blade design. Try a fresh blade and compare straight and curved test cuts before choosing one for the full project.
Are Reverse-Tooth Blades Better for Intarsia?
Reverse-tooth blades are popular because they can reduce underside splintering. They are especially helpful when a project requires clean edges on both faces, but they are not automatically the best blade for every cut.
Can I Use a Spiral Blade for Intarsia?
Yes, but conventional flat blades are generally easier to control when cutting precise mating edges. Spiral blades are better treated as a specialty option.
How Often Should I Replace Scroll Saw Blades?
Replace a blade when you notice increased cutting resistance, excessive heat, wandering, rougher edges, or the need to push harder. Blade life varies with the wood, cutting conditions, and blade quality.
Does a Higher Blade Number Mean More TPI?
Not necessarily. In many blade families, larger blade numbers have wider bodies and fewer teeth per inch. However, exact measurements vary, so always check the manufacturer’s chart.
Can One Scroll Saw Blade Cut Every Intarsia Project?
One blade can handle many cuts, but using several sizes usually gives you better control. Different wood thicknesses, grain patterns, and levels of detail may call for different blades.
Final Checklist Before You Start Cutting
Before beginning your next intarsia project, make sure:
- Your blade fits your scroll saw.
- The size is suitable for the wood thickness.
- The TPI and tooth type match the cutting task.
- The blade is sharp and correctly installed.
- Blade tension follows the manufacturer’s instructions.
- The table is square to the blade.
- You have tested the blade on scrap wood.
- Fine details are planned before cutting.
- Your workpiece is held flat and controlled safely.
- You’re wearing appropriate eye protection and following your saw’s safety instructions.
Final Thoughts: Choose the Best Scroll Saw Blades for Intarsia With Confidence
The best scroll saw blades for intarsia aren’t necessarily the most expensive, largest, or finest blades available.
They’re the blades that help you make controlled, accurate cuts in the wood you’re actually using.
Start with a few reliable sizes, understand how TPI affects cutting, and experiment with different tooth configurations.
Most importantly, don’t ignore the signs that your blade needs changing.
A fresh blade, properly tensioned saw, and light feed pressure can make a major difference in how your pieces fit together.
Once you’re comfortable selecting the right blade, you’ll spend less time correcting cuts and more time enjoying the creative side of woodworking.
Ready for your next project?
Explore premium digital intarsia patterns at IntarsiaPattern, including wildlife, birds, animals, nature-inspired designs, and seasonal woodworking projects.
Find a pattern that inspires you, choose the right blade, and start creating beautiful dimensional wood art.

Zaid Hussain
Articles from IntarsiaPattern focus on intarsia woodworking, scroll saw techniques, digital patterns and practical project guidance.



Comments 0
Have a question or something useful to add? Share it below.