

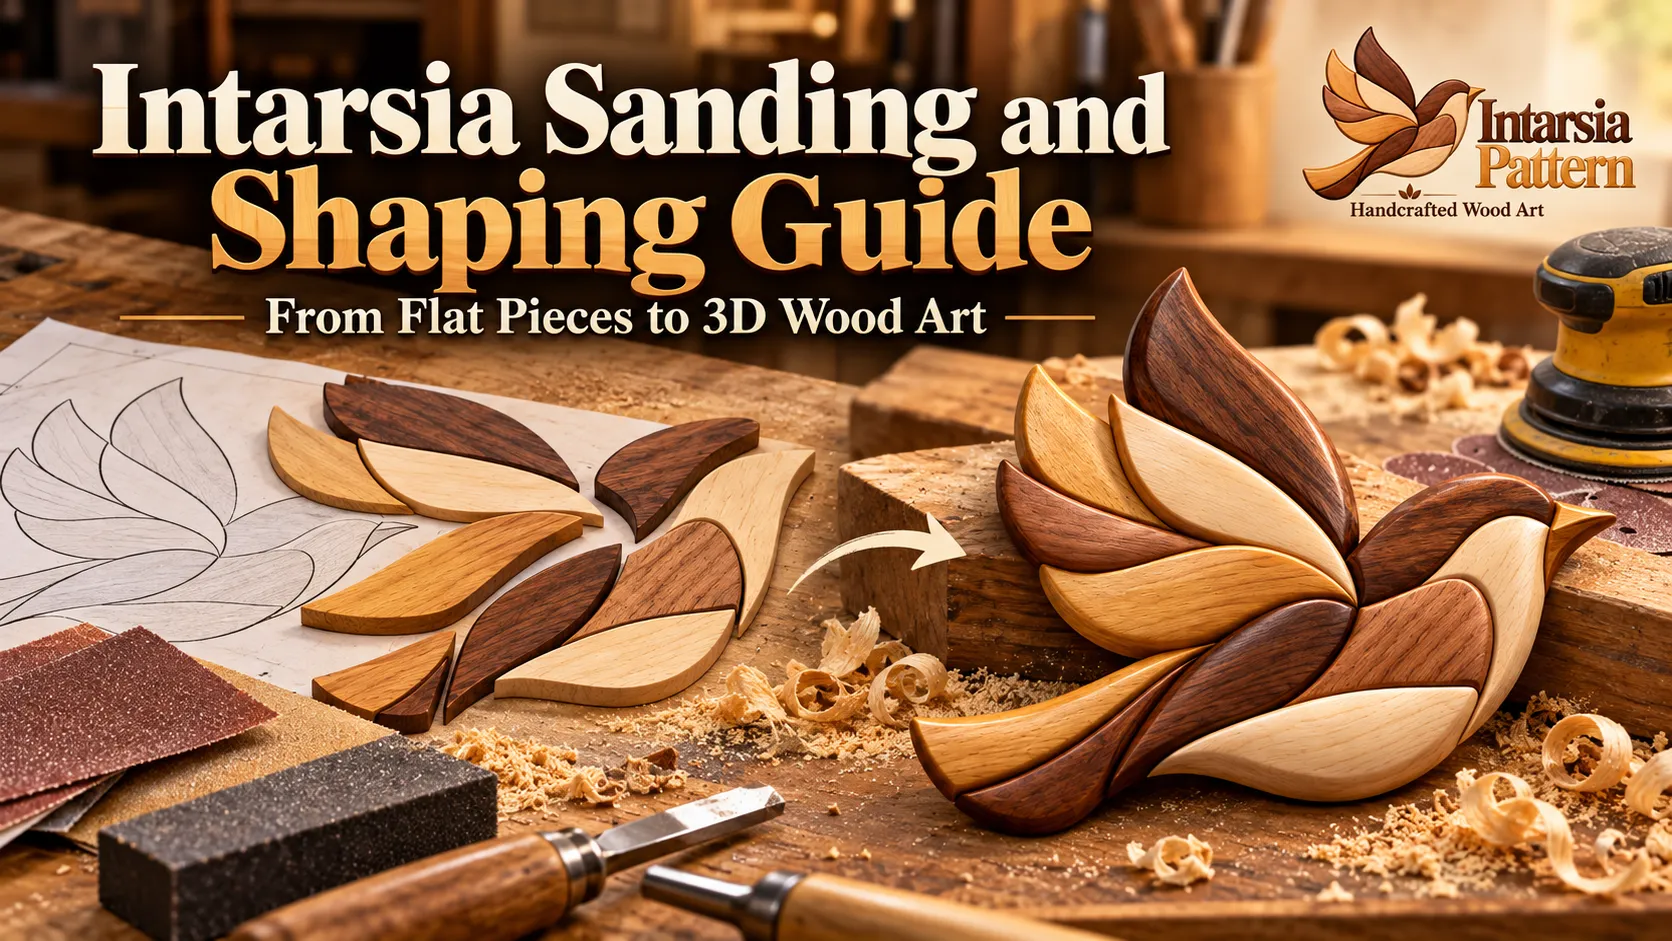
Imagine cutting every piece of a beautiful wooden owl pattern. The eyes are perfectly positioned, the feather colors look natural, and the entire design fits together.
But something still feels missing.
The owl looks flat.
Its wings don’t seem to overlap. The chest has little depth, and the face doesn’t have the expression you imagined.
This is where intarsia sanding and shaping guide changes everything.
With carefully planned contours, subtle height differences, and the right sanding techniques, ordinary wooden pieces can become realistic dimensional artwork.
You don’t need to be an expert woodcarver to create this effect.
You need to understand where to remove wood, which areas to preserve, and how neighboring pieces should flow together.
This guide explains the complete process, from preparing flat pieces to creating smooth 3D contours, realistic feathers, rounded animal features, curved flower petals, and beautiful finished wood art.
Whether you’re working on your first intarsia pattern or improving an advanced wildlife project, these techniques will help you create more natural-looking results.
What Is Intarsia Sanding and Shaping?
Intarsia sanding and shaping is the process of removing and contouring wood to give separate pieces a three-dimensional appearance.
Instead of leaving every component flat, woodworkers shape the visible surfaces to create curves, raised areas, tapered edges, and natural transitions.
Sanding refines the surface, while shaping determines the form.
Together, these techniques transform a flat wooden puzzle into dimensional artwork.
For example, shaping can make a bird’s feathers appear to overlap, a bear’s nose project forward, or a flower petal curl naturally toward the viewer.
The goal is not simply to make the wood smooth.
The goal is to create believable depth.
If you’re completely new to this woodworking method, begin with our Intarsia for Beginners guide.
Why Sanding and Shaping Matter in Intarsia Woodworking
A scroll saw creates accurate outlines, but it cannot create every surface contour needed for realistic dimensional wood art.
The shaping stage determines how light falls across those outlines.
When a piece has a rounded surface, the light creates gradual highlights and shadows.
When another piece sits slightly higher, its shadow helps separate it from the background.
These differences make the complete image easier to recognize.
Consider a wooden wolf portrait.
The nose should generally appear closer to the viewer than the cheeks. The forehead transitions into the muzzle, and the fur follows the shape of the head.
If every piece is rounded into a separate dome, the wolf may begin to resemble a collection of wooden buttons.
A more realistic approach uses some strongly curved pieces, some gentle contours, and a few flatter areas.
This balance is what makes dimensional shaping effective.
Flat Intarsia vs. 3D Intarsia
| Feature | Flat Intarsia | Dimensional Intarsia |
|---|---|---|
| Surface | Mostly level | Curved and shaped |
| Feather detail | Defined mainly by outlines | Defined by contours and overlapping forms |
| Shadows | Limited | Natural depth and separation |
| Raised features | Minimal | Controlled with shaping and shims |
| Visual effect | Decorative wooden mosaic | Sculptural wooden artwork |
| Work required | Primarily cutting and fitting | Additional shaping and finishing |
Both approaches can produce attractive results.
However, if your goal is realistic wildlife, birds, flowers, or expressive animal portraits, dimensional shaping provides more possibilities.
Tools You Need for Intarsia Sanding and Shaping
You do not need every power tool available in a professional woodworking workshop.
A small, well-organized collection is enough to begin.
Essential Sanding and Shaping Tools
| Tool | Main Purpose | Beginner Tip |
|---|---|---|
| Sandpaper | Surface smoothing and final refinement | Start with a grit appropriate for the surface |
| Sanding block | Keeping flat areas controlled | Use for backs and selected mating surfaces |
| Sanding sticks | Small details and narrow spaces | Make different sizes from scrap wood |
| Drum sander | Creating curves and rounded contours | Remove material gradually |
| Spindle sander | Working on curved areas | Keep pieces securely controlled |
| Rotary tool | Fine details and local shaping | Use light pressure and suitable bits |
| Files and rasps | Removing small amounts of wood | Follow the grain where possible |
| Pencil | Marking shaping boundaries | Identify areas that must remain untouched |
| Small straightedge | Checking contours | Useful when comparing neighboring pieces |
| Dust extraction | Controlling airborne wood dust | Use during sanding whenever possible |
A powered carving or sanding tool can remove wood surprisingly quickly.
Start slowly and practice on offcuts before shaping your actual project.
Choosing the Right Sandpaper Grit
Different sanding grits serve different purposes.
The following sequence is a practical starting point, not a rule that every project must follow.
| Grit | Recommended Use |
|---|---|
| 80 | Heavy stock removal on suitable large pieces |
| 100–120 | Initial shaping and removing light tool marks |
| 150–180 | Refining curves and surface transitions |
| 220 | Final smoothing before many clear finishes |
| 320 | Optional extra refinement when appropriate for the selected finish |
Start with the least aggressive grit that can complete the job efficiently.
Using 80-grit paper on a delicate feather tip may remove too much material.
Similarly, starting with 320-grit when a large contour needs shaping will make the job unnecessarily slow.
The correct grit depends on the wood species, grain, tool marks, desired contours, and finishing product.
Step-by-Step Intarsia Sanding and Shaping Process
A reliable workflow makes shaping easier and helps protect your carefully cut pieces.
Step 1: Cut and Label Every Wooden Piece
Start with an accurately printed intarsia pattern.
Transfer the templates to the chosen wood and follow the intended cutting lines carefully.
Keep a complete master copy of the pattern.
Number the wooden components so you know where each piece belongs.
Before sanding, organize your project into major sections.
For an owl, you might create separate groups for the head, wings, chest, feet, and branch.
For a hummingbird, organize the body, wing, tail, flower, and leaves.
Working in groups makes complex patterns easier to manage.
Step 2: Dry Fit the Complete Design
Place the pieces together on a flat surface before using a power sander.
Check the overall silhouette.
Do neighboring pieces fit correctly?
Are the feather roots aligned?
Do the facial features appear symmetrical?
Are any pieces higher because the original boards have different thicknesses?
Mark problems with a pencil.
Do not begin aggressive contour shaping until you understand how the parts fit.
Step 3: Create a Simple Depth Plan
Before removing wood, decide which areas should look closer to the viewer.
Use the finished reference image as your guide.
A useful beginner approach is to classify the pieces into three depth groups:
- Background: Lower or more gently shaped sections.
- Middle layer: Main structural shapes.
- Foreground: Important raised features.
For example, a flower’s back petals may sit lower than its central petals.
A bird’s outer wing feathers may sit behind selected overlapping feather layers.
A bear’s nose may project beyond the cheeks.
This depth plan prevents you from shaping every piece in exactly the same way.
Step 4: Mark the Areas You Want to Shape
Use a soft pencil to draw the intended contours onto the wooden pieces.
Mark the center of rounded sections.
Indicate where a surface should slope downward.
Draw a boundary near delicate edges that must retain their original shape.
For a feather, the highest area may be near the thicker central section, with a gradual taper toward the tip.
For a flower petal, the surface may be fuller near its base and thinner toward its outer edge.
Do not assume that every piece needs to become a perfect dome.
The shape should follow the object you are trying to represent.
Step 5: Begin Rough Shaping
Work on a stable, appropriately sized piece.
Use a sanding drum, suitable abrasive tool, or controlled hand-shaping method to remove material.
Make light passes.
Check the shape frequently.
When working on a curved surface, avoid holding the abrasive in one place for too long.
This can create unwanted depressions or flat spots.
Work across the intended curve rather than digging into one small area.
Stop regularly and compare the piece with your depth plan.
Step 6: Refine the Curves
After the main contours are established, change to a finer abrasive.
Smooth the transitions between high and low areas.
Feel the surface with your fingers when the tool is switched off and the workpiece is safe to handle.
Check for unwanted ridges, rough marks, or abrupt changes in direction.
A good curve should usually feel intentional and continuous.
Look at the wood from the side as well as from above.
This often reveals problems that are difficult to notice in a top-down view.
Step 7: Recheck the Fit
Return the shaped pieces to their original positions.
Check neighboring edges.
Make sure the new contours haven’t removed material needed for a clean joint.
If one section no longer aligns correctly, determine whether the problem comes from over-sanding, inaccurate positioning, or a change in thickness.
Correct the cause before continuing.
Step 8: Complete the Final Sanding
Once the shapes and fit are satisfactory, use finer abrasives to remove the remaining sanding marks.
For many projects, progressing through 150 or 180 grit and finishing around 220 grit provides a suitable surface.
Some woods and finishes may benefit from a different final grit.
Follow the finish manufacturer’s guidance.
Remove sanding dust using suitable extraction and cleaning methods.
Do not use compressed air to blow dust across the workshop.
How to Get Fit Intarsia Pieces Without Damaging the Edges
One of the biggest beginner mistakes is sanding away material from edges that should fit closely together.
The outside shape of each piece is important.
If you remove too much material from adjoining edges, the gaps between the pieces may become wider.
That is why learning how to get fit intarsia pieces is directly connected to proper sanding technique.
Understand the Difference Between Surface Shaping and Edge Fitting
Surface shaping changes the visible face of the wood.
Edge fitting corrects the relationship between neighboring components.
These are related but different operations.
Imagine two pieces forming a bird’s wing.
The upper surfaces may need rounded feather contours, while the joining edges must still align accurately.
Heavy sanding across the entire edge can destroy that fit.
Instead, remove material primarily from the intended visible contours.
Preserve the necessary mating surfaces.
How to Get Fit Intarsia Pieces After Rough Shaping
Follow this simple process:
- Place the shaped components back on the master layout.
- Check the contact points between neighboring pieces.
- Look for gaps that widen toward one end.
- Inspect whether the bottom edges remain square.
- Identify small burrs or high contact points.
- Make controlled corrections only where necessary.
- Reassemble and inspect the entire group.
Avoid sanding every neighboring edge simply because one piece looks slightly incorrect.
If a piece is substantially undersized, cutting a replacement is often better than reshaping the surrounding design.
For more detailed fitting advice, read our How to Get Fit Intarsia Pieces guide.
How to Get Fit Intarsia Pieces When a Joint Opens After Sanding
First, identify whether the gap is caused by rounded edges, an angled cut, or missing material.
A small top-edge bevel may create a visible shadow line even when the lower portions remain aligned.
That can be intentional in some designs.
However, a large irregular opening may indicate excessive material removal.
Check the piece against your original template before making additional adjustments.
Do not try to hide major fitting errors under filler.
Preserving the original design is more important than forcing one joint closed.
Creating Smooth 3D Contours With Sanding Shims
Sanding shims are among the most useful techniques for shaping several neighboring pieces together.
A sanding shim is a temporary support used to hold a group of wooden pieces during shaping.
Unlike a permanent raising shim, the sanding shim is removed after the shaping process.
Why Sanding Shims Improve Intarsia Shaping
Imagine making the forehead and cheeks of a wooden fox.
If you sand every component independently, you may create separate rounded bumps.
When the pieces are placed together, the face can look uneven.
A sanding shim allows the group to be shaped as one connected surface.
This helps create a continuous curve across multiple components.
How to Make a Simple Sanding Shim
Start with a flat piece of plywood, MDF, or another suitable stable sheet material.
Cut it to support the group you want to shape.
Arrange the individual wood pieces according to your master pattern.
Use appropriate removable double-sided tape to secure them to the support.
Check that every piece is firmly held.
The workpiece must be stable throughout shaping.
If pieces begin moving, stop immediately and improve the holding method.
Use controlled sanding to establish the overall contour.
Once the desired shape is achieved, remove the pieces carefully and complete any necessary individual refinement.
Never use an insecurely taped assembly against an aggressive power sander.
Sanding Shims vs. Raising Shims
These two terms are easy to confuse.
| Sanding Shim | Raising Shim |
|---|---|
| Temporary support | Permanent depth spacer |
| Holds pieces during shaping | Raises selected pieces in the final design |
| Helps create continuous curves | Adds dimensional elevation |
| Removed after shaping | Remains part of the assembly |
| Usually made from stable sheet material | Can use suitable wood or engineered backing material |
Understanding the difference makes dimensional planning much easier.
How to Create 3D Depth With Raising Shims
You do not always need to carve deeply into thick wood to create dimensional artwork.
Sometimes, raising selected pieces produces the desired effect more efficiently.
A raising shim is placed beneath a component to elevate it relative to neighboring pieces.
Example: Creating a Raised Animal Nose
Imagine a bear portrait.
The main face sits at the middle depth level.
The cheeks are gently contoured.
The nose projects farther forward.
Instead of removing excessive material from the entire face, you may use a suitable raising shim behind the nose.
Its exposed edges should blend naturally into the surrounding muzzle.
The amount of elevation depends on the size, wood thickness, design, and desired appearance.
Avoid the Stair-Step Effect
Raising a piece without blending its boundaries can create an abrupt step.
This often looks unnatural.
Use gradual surface transitions where appropriate.
A raised nose should flow into the muzzle.
A raised wing should appear connected to the body.
A foreground leaf should stand out without looking randomly stacked.
Not every raised edge needs to disappear completely.
Some designs use distinct layers intentionally.
The important thing is that the depth supports the subject.
Intarsia Sanding and Shaping for Bird Feathers
Bird designs are particularly rewarding because feather contours create beautiful shadows.
However, feathers can be challenging because they often have narrow, fragile tips.
Shape From Root to Tip
Start by identifying the direction of the feather.
The root is the thicker area closest to the bird’s body.
The tip is the narrow outer end.
The central surface may remain gently rounded, while the feather becomes thinner toward the tip.
Avoid making every feather equally rounded.
Varying the contours helps create more natural movement.
Create Overlapping Wing Layers
Consider a flying eagle intarsia pattern.
The large outer feathers form the main wing shape.
Smaller overlapping feathers sit above them.
Shaping should help viewers understand which feathers are in front.
Keep the feather roots substantial enough for the intended assembly.
Use careful tapers rather than thinning everything to a fragile edge.
Protect Small Feather Tips
Tiny wooden parts are difficult to hold safely against rotating abrasives.
Use suitable holding jigs or controlled hand-sanding techniques.
Do not bring your fingers close to a rotating sanding drum.
Work slowly and remove minimal material at a time.
If a feather becomes too thin, it may break during handling or assembly.
Shaping Animal Faces for Realistic Intarsia Wood Art
Animal portraits often require more subtle shaping than beginners expect.
Strong features should stand out, while surrounding surfaces should transition smoothly.
Eyes and Eyebrows
The eye area is usually an important focal point.
Avoid removing too much wood around it.
For an owl, the circular facial disks and eyebrows can create much of the expression.
Subtle shaping around the eyes may be more convincing than aggressive rounding.
Noses and Muzzles
A dog’s nose, wolf’s muzzle, or bear’s snout can benefit from gentle elevation.
Plan the depth before shaping.
Use the forehead, cheeks, and jaw as reference areas.
The nose should appear connected to the rest of the face.
Fur and Texture
Don’t assume realistic fur requires deep grooves everywhere.
Small changes in grain direction, wood color, and surface contour can suggest fur naturally.
More texture is not always better.
Use detailed texture selectively, especially around the cheeks, neck, and ears.
Intarsia Sanding and Shaping for Flowers and Leaves
Botanical intarsia designs need a different approach from wildlife portraits.
Flower petals usually require soft curves and gentle transitions.
Shaping Flower Petals
Start near the base of the petal.
Create a gentle outward curve.
The outer tip may become slightly thinner or curl upward depending on the design.
Avoid shaping every petal identically.
Natural flowers often have subtle differences in their forms.
Creating Realistic Leaves
A leaf can have a gentle central ridge with surfaces sloping toward the sides.
The edges may be slightly raised or lowered.
Follow the leaf’s natural direction.
A carefully shaped leaf often looks more convincing than one with an excessively deep carved vein.
Combining Birds and Flowers
For a hummingbird and flower design, the raised wing and flower petals should remain visually distinct.
Use the bird’s wing contours to suggest movement.
Shape the flower petals to create depth around the center.
The finished composition should feel balanced, with both subjects contributing to the overall scene.
Intarsia Sanding and Shaping Mistakes Beginners Should Avoid
Many shaping problems begin with small decisions.
Understanding these mistakes helps prevent unnecessary rework.
| Mistake | What Happens | Better Approach |
|---|---|---|
| Starting with overly coarse sandpaper | Too much wood disappears | Use the least aggressive grit that works |
| Sanding every piece into a dome | Artwork looks quilted or bumpy | Use varied and natural contours |
| Removing material from fitting edges | Visible gaps develop | Protect mating surfaces |
| Ignoring grain direction | Feather and leaf shapes look unnatural | Shape with the grain pattern in mind |
| Over-thinning small pieces | Tips become fragile | Preserve structural thickness |
| Skipping dry fitting | Assembly problems appear later | Check fit before and after shaping |
| Using too much pressure | Grooves and flat spots develop | Shape gradually |
| Ignoring the side view | Depth looks inconsistent | Inspect from multiple angles |
| Using raising shims without blending | Unnatural stair-step effect | Smooth transitions where appropriate |
| Rushing final sanding | Scratches remain under the finish | Follow a consistent grit progression |
How to Know When to Stop Sanding
One of the hardest skills to develop is recognizing when a piece is finished.
You may be tempted to keep sanding because the surface could always become slightly smoother.
But additional sanding is not always an improvement.
Stop when the intended contour is established, tool marks are removed, and the piece fits correctly.
Compare your progress with the surrounding sections.
Ask whether the shape adds realism or merely removes more material.
How Lighting Changes the Appearance of 3D Intarsia
A useful way to evaluate shaping is to inspect the project under directional light.
Place the dry-fitted design where light falls across the surface from one side.
Look for the highlights and shadows.
Do the feathers appear to overlap?
Does the animal’s face have natural depth?
Does the flower center appear raised?
Now move the light.
A well-balanced design should still read clearly from different lighting directions.
Take a photograph and look at the image from a normal viewing distance.
This can help reveal inconsistent contours that are less obvious while working close to the piece.
Sanding Safety: Protect Your Hands and Lungs
Wood sanding creates fine airborne dust.
Some wood species produce irritating or sensitizing dust, and repeated exposure can create serious health risks.
Use effective dust extraction positioned near the sanding area.
Wear appropriate eye protection and suitable respiratory protection for the task and working conditions.
Make sure small wooden pieces are held securely before using powered equipment.
Do not wear loose clothing or accessories near rotating tools.
Follow the safety instructions for your particular machine.
Clean the workshop using suitable vacuum equipment rather than dry sweeping or blowing dust into the air.
Good dust control is an important part of a healthy woodworking workspace.
Final Sanding Before Finishing
Once the components are shaped and fitted, prepare them for the selected finish.
Check for rough patches, visible scratches, adhesive residue, and uneven surfaces.
Sand progressively with finer abrasives.
Avoid excessive pressure on narrow tips and raised details.
Remove dust thoroughly.
Before applying a finish to the actual project, test it on scrap pieces of the same wood.
Some finishes darken wood more than expected.
This may reduce the contrast between neighboring intarsia pieces.
You should also consider your assembly method.
If glue must bond directly to unfinished wood, keep the intended glue surfaces free from finishes that could weaken adhesion.
Follow the adhesive and finish manufacturers’ instructions.
A thoughtful finishing plan protects both the appearance and durability of the artwork.
A Beginner-Friendly Intarsia Shaping Workflow
Here is a practical order to follow for your next woodworking project:
- Print and prepare the intarsia pattern.
- Select wood colors and grain directions.
- Cut and number all wooden components.
- Dry-fit the complete design.
- Correct important cutting and fitting errors.
- Plan the intended depth of each section.
- Mark areas that require contour shaping.
- Use appropriate sanding tools for rough shaping.
- Shape adjoining areas together where practical.
- Add raising shims where the design requires extra depth.
- Refine the individual surfaces and feather or petal details.
- Recheck the fit and overall silhouette.
- Complete the final sanding.
- Prepare the backing board and assembly layout.
- Apply glue and finishes in the correct sequence for your materials.
- Install suitable hanging hardware and inspect the completed project.
Following an organized process reduces mistakes and makes larger projects easier to manage.
If you’re planning a new design, browse our Intarsia Patterns Shop for bird, animal, wildlife, nature, and seasonal woodworking inspiration.
Frequently Asked Questions About Intarsia Sanding and Shaping
What Is the Best Sandpaper Grit for Intarsia?
For many projects, 120 grit is a useful starting point for initial surface refinement, followed by 150 or 180 grit and a final 220-grit sanding.
The best progression depends on the starting surface, wood species, shaping requirements, and selected finish.
How Do You Make Intarsia Look Three-Dimensional?
Create gradual surface contours, vary the height of selected pieces, and use natural wood colors and grain direction to support the subject.
Raising shims can add elevation, while sanding shims can help adjoining pieces flow together smoothly.
Should You Sand Intarsia Pieces Before Gluing?
Most detailed shaping and fitting are easier before permanent assembly.
However, the final finishing and gluing sequence depends on the design, backing board, adhesive, and selected finish.
Keep required bonding surfaces suitable for the adhesive.
How Do You Keep Intarsia Pieces From Developing Gaps?
Dry-fit before shaping, preserve the mating edges, use controlled sanding, and check alignment frequently.
If one piece is badly undersized or incorrectly shaped, replacing it may provide a better result than changing every neighboring component.
What Are Sanding Shims Used For?
Sanding shims temporarily hold multiple intarsia pieces in their correct relationship so they can be shaped as a group.
They help create natural transitions across adjoining components.
What Is the Difference Between Sanding Shims and Raising Shims?
Sanding shims are temporary shaping supports.
Raising shims remain under selected pieces in the final artwork to create additional elevation.
How Do You Shape Tiny Intarsia Pieces Safely?
Use appropriate holding methods, hand-sanding tools, and light pressure.
Avoid holding very small parts dangerously close to powered abrasives.
Protect delicate tips from excessive material removal.
Can You Shape Intarsia Without a Drum Sander?
Yes.
Small projects can be shaped using sanding blocks, sanding sticks, files, rasps, and carefully selected hand tools.
Power tools make some operations faster, but they are not essential for every design.
Why Does My Finished Intarsia Look Too Rounded?
Every piece may have received the same heavy edge rounding.
Try varying the contours, preserving some flatter areas, and shaping neighboring pieces together.
This creates a more natural overall form.
Final Thoughts: Turn Flat Pieces Into Beautiful 3D Wood Art
Intarsia sanding and shaping is where a woodworking pattern begins to gain personality.
Cutting gives each piece its outline, but shaping determines how the finished subject looks and feels.
A carefully tapered feather can suggest movement.
A raised nose can make an animal portrait more expressive.
A gently curved petal can transform a wooden flower into dimensional botanical art.
The most important lesson is to shape with intention.
Don’t remove wood simply because you have a sander available.
Study the design, plan its depth, preserve the important fitting edges, and refine the surfaces gradually.
As your confidence grows, experiment with sanding shims, raising shims, different contours, and more detailed projects.
Every finished piece offers an opportunity to improve.
Ready to create your next woodworking project?
Explore the collection of digital intarsia patterns at IntarsiaPattern and bring your next dimensional wood art idea to life.

Zaid Hussain
Articles from IntarsiaPattern focus on intarsia woodworking, scroll saw techniques, digital patterns and practical project guidance.


Comments 0
Have a question or something useful to add? Share it below.