

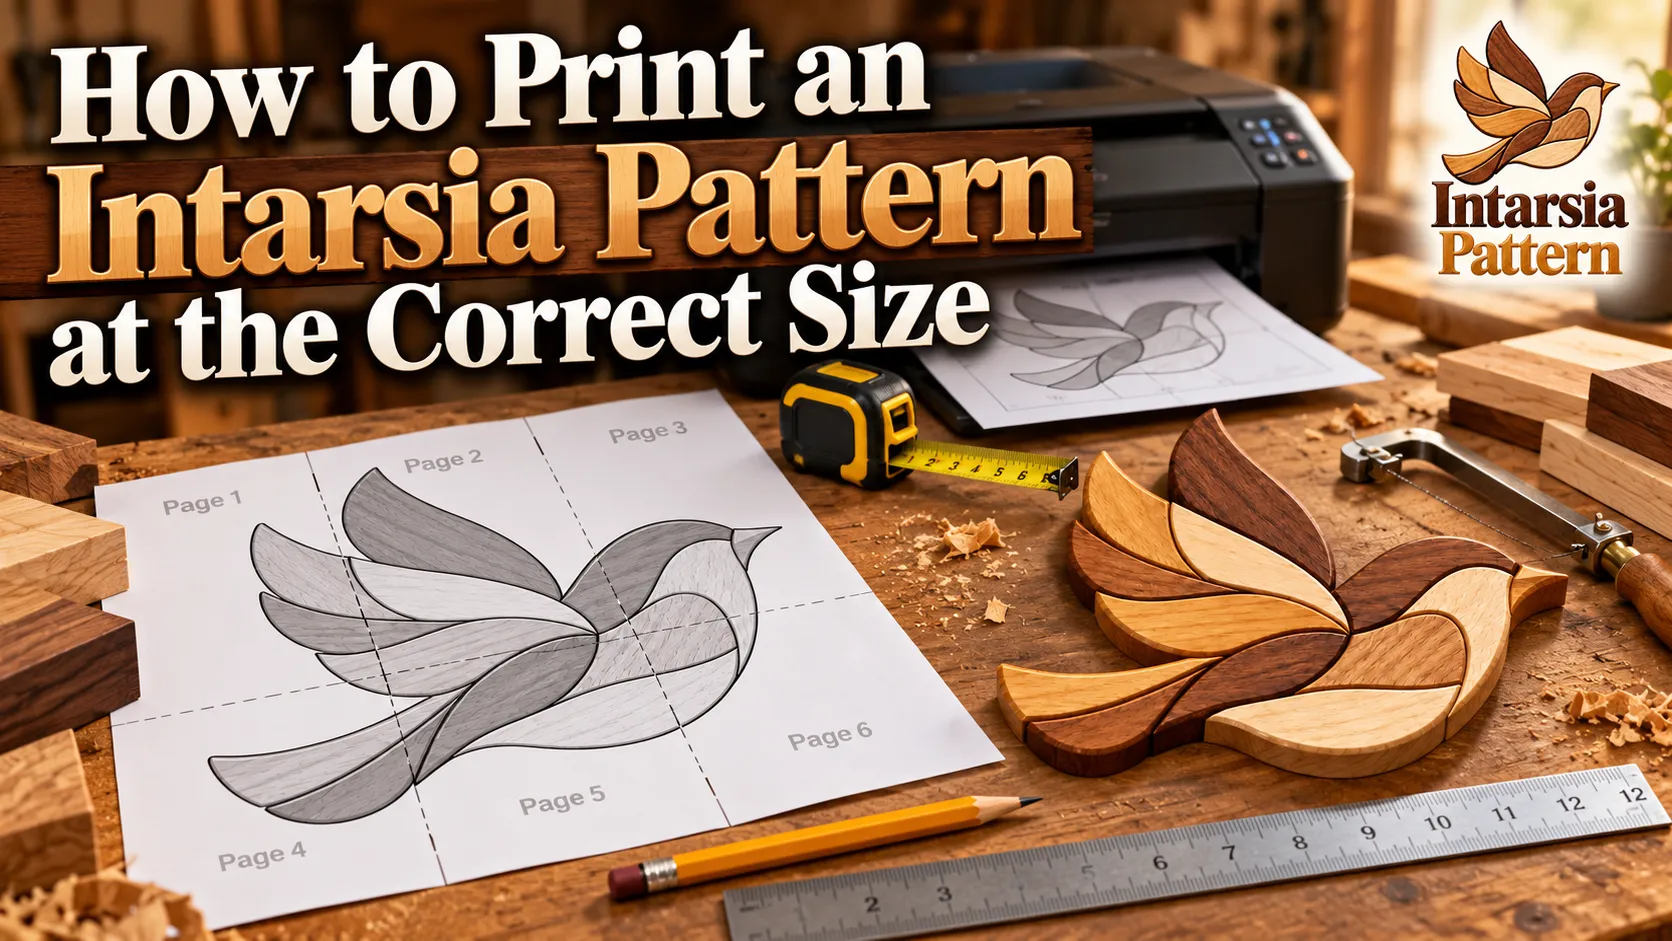
You’ve found an intarsia pattern you love, downloaded the PDF, and picked out your wood. Everything seems ready until you print the design and discover that it’s smaller than expected.
It’s a frustrating problem, especially when you’re excited to start cutting.
The good news? Learning how to print an intarsia pattern at the correct size is easier than it sounds. You don’t need an expensive printer or special software. You just need the right file, a few print settings, and a quick measurement check.
This guide explains how to print woodworking patterns at actual size, enlarge or reduce designs, join multiple printed pages, and avoid mistakes that can affect your finished project.
How to Print an Intarsia Pattern: The Quick Answer
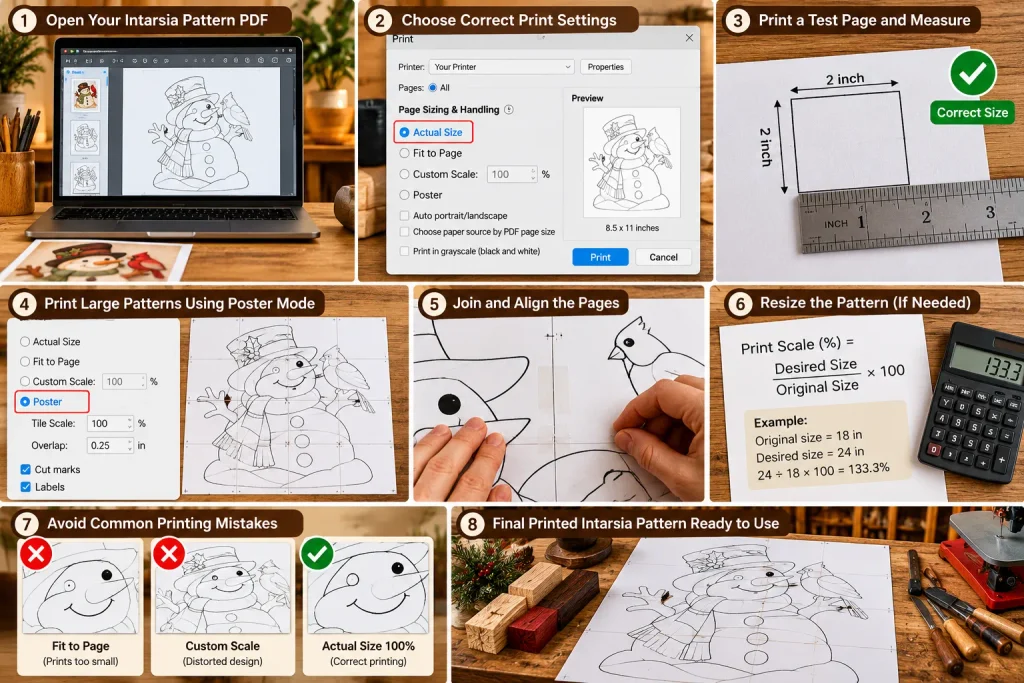
To print an intarsia pattern at the correct size, open the full-size cutting PDF in Adobe Acrobat Reader, choose Print, and select Actual Size or 100% scaling.
Make sure the correct paper size is selected and turn off Fit to Page. Print one test page and measure a known dimension before printing the entire pattern.
If the pattern is larger than your paper, use Poster printing to divide it across multiple sheets.
The most important rule is simple: always verify the printed dimensions before transferring the design to wood.
Why Printing an Intarsia Pattern at the Correct Size Matters
Intarsia woodworking uses individual pieces of wood that fit together to create a complete picture.
Some pieces form the background. Others are shaped and raised to create depth.
For everything to fit correctly, the printed cutting templates must maintain the intended proportions.
Imagine making a wooden fox portrait. If the head is printed at one scale and the ears at another, the pieces will no longer fit the original layout.
Even a small size difference can cause problems when you’re working with detailed curves.
Accurate printing helps you:
- Maintain the intended finished dimensions.
- Keep adjoining pieces proportional.
- Preserve narrow details and cutting lines.
- Plan wood thickness and material requirements.
- Assemble the finished design more accurately.
Printing at the wrong scale doesn’t always ruin a project. However, different sections must never be printed at inconsistent scales.
If you’re new to woodworking patterns, explore our Intarsia for Beginners guide before starting your first project.
Before You Print an Intarsia Pattern, Check the PDF
Not every page inside a woodworking PDF serves the same purpose.
A digital pattern package may contain a finished-project photograph, numbered piece diagram, cutting templates, assembly instructions, and reference illustrations.
Understanding the difference will save you paper, time, and unnecessary confusion.
Find the Full-Size Cutting Pattern
Look for the page or file specifically identified as the cutting pattern, master pattern, full-size template, or tiled cutting layout.
This is the artwork you need to print at the intended dimensions.
A finished-project photograph is useful for understanding colors and assembly, but it is not automatically a cutting template.
Likewise, a small diagram inside an instruction guide may be intended only as a visual reference.
Before printing, check whether the pattern maker provides a stated finished size and whether the cutting template is already formatted to that size.
Check the Paper Format
Most home printers use one of these paper sizes:
| Paper format | Dimensions |
|---|---|
| US Letter | 8.5 × 11 inches |
| A4 | 210 × 297 mm |
| US Legal | 8.5 × 14 inches |
| A3 | 297 × 420 mm |
US Letter is common in the United States, while A4 is widely used internationally.
Both work for intarsia woodworking.
The important thing is choosing a layout that matches your printer and the supplied pattern file.
Keep an Original Master Copy
Before separating individual templates, save an untouched digital copy.
Your master pattern is the reference you’ll use to check part numbers, grain direction, cutting boundaries, and assembly positions.
If you accidentally damage a paper template, you can print another copy at the same scale.
How to Print an Intarsia Pattern at 100% Size
For many beginners, Adobe Acrobat Reader is a convenient way to print PDF woodworking templates.
Step 1: Open the PDF
Download the pattern to your computer.
Open the actual cutting-pattern PDF in Adobe Acrobat Reader rather than relying on a browser’s quick-print option.
Select the page or pages containing the cutting template.
Step 2: Open the Print Settings
Choose File → Print.
Select your printer and confirm that the paper size matches the sheets loaded in the tray.
Check the print preview before continuing.
Step 3: Select Actual Size
Under Page Sizing & Handling, choose Actual Size.
This setting prints the PDF without automatic enlargement or reduction.
If your print dialog provides a custom scaling option instead, use 100% when the file is already prepared at its intended physical size.
Avoid Fit or Fit to Page when exact dimensions are required. Those settings can change the printed size to accommodate printer margins.
Step 4: Print One Test Page
Don’t print every page immediately.
Print a page containing a measurement reference, calibration square, or known dimension.
If the pattern doesn’t provide one, use a clearly labeled dimension in the drawing.
Measure it with a reliable ruler.
If the printed measurement is correct, continue with the remaining pages using exactly the same settings.
What if the Intarsia Pattern Gets Cut Off at 100%?
A full-size PDF may extend beyond your printer’s printable area.
In that case, choosing Actual Size can crop part of the page.
Do not automatically switch to Fit to Page.
Instead, use a properly tiled layout, select a larger paper size, or print through the Poster option.
That way, you can preserve the intended scale without losing important cutting lines.
How to Print a Large Intarsia Pattern on Multiple Pages
Many intarsia projects are larger than an ordinary sheet of paper.
For example, a wildlife design may have a finished width of 20 inches or more.
You can still print it using a standard home printer.
The solution is tiled printing.
What Is Tiled Printing?
Tiled printing divides one large drawing across several smaller sheets.
After printing, the sheets are aligned and taped together to form the complete design.
This is especially useful for large animal portraits, Christmas decorations, floral designs, and detailed scroll saw projects.
Print an Intarsia Pattern Using Poster Mode
- Open the full-size PDF in Adobe Acrobat Reader.
- Select File → Print.
- Choose Poster under Page Sizing & Handling.
- Set Tile Scale to 100% if the source pattern is already at the correct full size.
- Add approximately 0.25 inches (6 mm) of overlap to help align adjoining sheets.
- Enable cut marks and labels when available.
- Review the preview to confirm that no sections are missing.
- Print the pages and arrange them in their correct positions.
Poster printing is intended for large-format pages. If your download already contains numbered, pre-tiled pages, print those at their specified scale instead of tiling them again.
How to Join the Printed Pages
Place the sheets on a clean, flat table.
Find matching lines where two pages meet.
Trim one overlapping margin, align the printed lines precisely, and secure the sheets with transparent tape on the back.
Work from the center outward to prevent the paper from shifting.
Don’t pull or stretch the paper to make the lines meet.
Check the Intarsia Pattern After Taping
Once the complete design is assembled, measure its overall height and width.
Compare those measurements with the intended finished dimensions.
Also inspect long curves and neighboring cutting lines.
A pattern may have the correct total width but still contain an incorrectly joined section.
Finding that problem now is much easier than discovering it after cutting your wood.
How to Resize an Intarsia Pattern Without Distortion
Sometimes you want the finished artwork to be larger or smaller than the original design.
Perhaps you’re making a compact bird ornament or enlarging an animal portrait for wall décor.
The correct approach is proportional scaling.
Calculate the Correct Print Percentage
Use this formula:
Print scale (%) = Desired size ÷ Original size × 100
Suppose your original cutting pattern is 18 inches wide and you want a finished width of 24 inches.
24 ÷ 18 × 100 = 133.3%
You would print the full-size pattern at approximately 133.3% of its original dimensions.
Here are more examples:
| Original size | Desired size | Print scale |
|---|---|---|
| 18 inches | 12 inches | 66.7% |
| 18 inches | 15 inches | 83.3% |
| 18 inches | 18 inches | 100% |
| 18 inches | 21 inches | 116.7% |
| 18 inches | 24 inches | 133.3% |
| 16 inches | 20 inches | 125% |
These calculations assume that the original PDF’s cutting artwork is already at its stated master size.
If the downloaded illustration is reduced or not calibrated, first establish its true printed scale.
Keep Width and Height Proportional
Never stretch an intarsia design horizontally or vertically just to make it fit a frame.
That can change the relationship between individual pieces.
A square animal portrait may become unnaturally wide, while narrow parts can become difficult to fit.
Apply the same scaling percentage to both dimensions.
Consider the Smallest Pieces
Making a pattern smaller also makes every detail smaller.
Thin bird tails, maple-leaf points, animal whiskers, and delicate decorative elements can become difficult or unsafe to cut.
Before reducing a detailed pattern, inspect the smallest sections.
Sometimes choosing a slightly larger finished size is the better woodworking decision.
How to Check Whether Your Intarsia Pattern Printed Correctly
Never trust the print preview alone.
The only reliable confirmation of physical scale is measuring the printed result.
Method 1: Measure a Calibration Square
Some digital woodworking patterns include a square labeled 1 inch, 2 inches, or 100 mm.
Print that page first.
Measure the square in both directions.
If a 100 mm square measures 100 mm wide and 100 mm tall, your printer has reproduced that reference at the intended size.
If it measures 96 mm wide, the page is smaller than intended.
Before attempting a manual correction, check that scaling is set correctly and that the printer driver isn’t applying a second adjustment.
Method 2: Measure a Known Pattern Dimension
If there is no calibration square, use a dimension explicitly marked on the original full-size drawing.
For example, a correctly prepared 18-inch-wide design should measure 18 inches across the corresponding reference points at 100% scale.
Don’t use a photo or decorative page border as your measurement reference unless its dimensions are stated.
Method 3: Check Both Directions
A successful width measurement doesn’t guarantee the height is correct.
Measure horizontally and vertically.
If one direction is correct but the other is not, investigate the source image, print settings, or possible distortion before cutting.
A small ruler check can save an entire afternoon in the workshop.
Common Intarsia Pattern Printing Problems and How to Fix Them
| Problem | Likely cause | Recommended fix |
|---|---|---|
| Pattern prints too small | Fit to Page is enabled | Select Actual Size or correct scaling |
| Pattern edges are missing | Printer cannot print to the paper edges | Use tiled printing or larger paper |
| Pages do not line up | Different scales or incorrect overlap | Reprint using consistent settings |
| Pattern looks stretched | Width and height were resized separately | Preserve aspect ratio |
| Cutting lines are blurry | Low-resolution image or screenshot | Use the original high-quality PDF |
| Finished size is incorrect | Source drawing is not at the expected physical scale | Check a reference measurement and calibrate |
| Pattern is divided into too many pages | Incorrect scale, paper format, or tiling settings | Review the print preview and selected paper |
| Small details disappear | Pattern was reduced excessively | Use a larger size or simplify fragile details |
How to Print an Intarsia Pattern When Lines Look Blurry
If the PDF looks clear on screen but the printout is fuzzy, first check the printer’s quality settings.
Use normal or high-quality printing instead of draft mode.
If the original file is a low-resolution photograph or screenshot, higher print quality cannot restore missing detail.
For precise cutting lines, use the original PDF or a properly prepared vector template when available.
Why Are My Tiled Pages Not Aligning?
Check whether every page was printed using identical settings.
Mixing Actual Size and Fit to Page can produce slightly different page dimensions.
Also verify that you’re using the correct sheets in the correct sequence.
If only one page is wrong, reprint that page rather than forcing the surrounding sheets to fit.
How to Read an Intarsia Pattern Before Transferring It to Wood
Once the printed scale is correct, spend a few minutes studying the design.
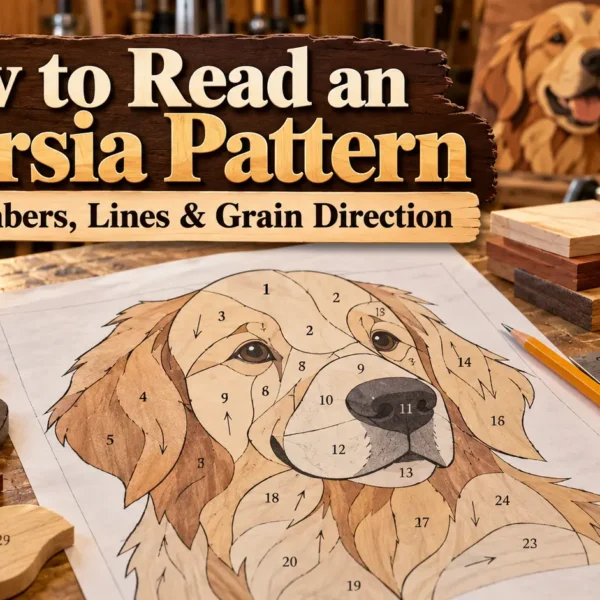
Identify the outer silhouette, individual piece boundaries, part numbers, grain arrows, and any markings that explain assembly.
A cutting line is not always the same as a decorative line or grain-direction marking.
Understanding these differences helps prevent unnecessary cuts.
For a deeper explanation, our guide on How to Read an Intarsia Pattern covers piece numbers, cutting lines, wood choices, and grain direction.
You can also explore What Is Intarsia to understand how shaped wood pieces form a dimensional picture.
What to Do After Printing Your Intarsia Pattern
Your pattern is now the correct size. Before picking up the scroll saw, prepare it for workshop use.
Keep one full copy intact as your master assembly reference.
Make working copies of the individual sections as needed.
Label each template clearly and mark the desired grain direction.
You can then transfer the pattern to the wood using your preferred method, such as removable pattern adhesive or transfer paper.
Check the position and grain of each part before cutting.
For complicated designs, organize the pieces into small groups such as the head, body, background, or decorative elements.
This makes dry fitting and final assembly easier.
Frequently Asked Questions About Printing Intarsia Patterns
Should I Print an Intarsia Pattern at 100%?
Yes, if the cutting PDF has been prepared at the intended full size. Choose Actual Size or 100% and verify a known measurement. If the pattern is supplied at a reduced scale, follow its enlargement instructions instead.
Can I Print an Intarsia Pattern on A4 Paper?
Yes. A4 works well for standard-sized pages and tiled printing. Just remember that changing from US Letter to A4 may affect page layout or cropping. Don’t let the printer automatically shrink a full-size cutting template.
How Can I Print an Intarsia Pattern Bigger Than One Page?
Use Poster printing in a compatible PDF reader or print an already tiled version of the pattern. Align the sheets using matching lines and overlap areas, then verify the completed dimensions.
Can I Enlarge an Intarsia Pattern by 200%?
Yes. Printing at 200% doubles both width and height when the source scale is correct. An original 10-inch design becomes approximately 20 inches across the corresponding dimension.
Why Does My Intarsia Pattern Print Smaller Than the PDF Says?
The most common cause is automatic page fitting. Printer margins, incorrect paper settings, or a source file that is not truly full-size can also contribute. Print a measured reference before continuing.
Is It Better to Print at Home or at a Print Shop?
Home printing is convenient for smaller and tiled patterns. A print shop can be useful for large, full-size drawings without taped joins. Whichever method you choose, request the correct physical scale and measure the final print.
Do I Need a Color Printer for Intarsia Patterns?
Usually not. A clear black-and-white cutting template is sufficient if all piece boundaries and labels remain readable. Keep the finished color reference available separately when choosing woods.
Final Checklist Before Your First Cut
Before transferring your printed template onto wood, make sure:
- You printed the correct cutting-pattern file.
- The finished dimensions match your intended project size.
- Automatic Fit to Page scaling is disabled where exact scaling is required.
- All tiled pages align without stretched or missing lines.
- The cutting lines, part numbers, and grain arrows are readable.
- Your master pattern is safely preserved.
- The smallest parts are practical to cut at the chosen size.
Learning how to print an intarsia pattern correctly is a small skill that makes every project easier.
A few extra minutes checking the scale can save valuable wood, reduce cutting mistakes, and help every piece fit the way it should.
Ready to put your new printing skills to work? Explore our digital intarsia patterns at IntarsiaPattern and find your next scroll saw woodworking project.

Zaid Hussain
Articles from IntarsiaPattern focus on intarsia woodworking, scroll saw techniques, digital patterns and practical project guidance.


Comments 0
Have a question or something useful to add? Share it below.