

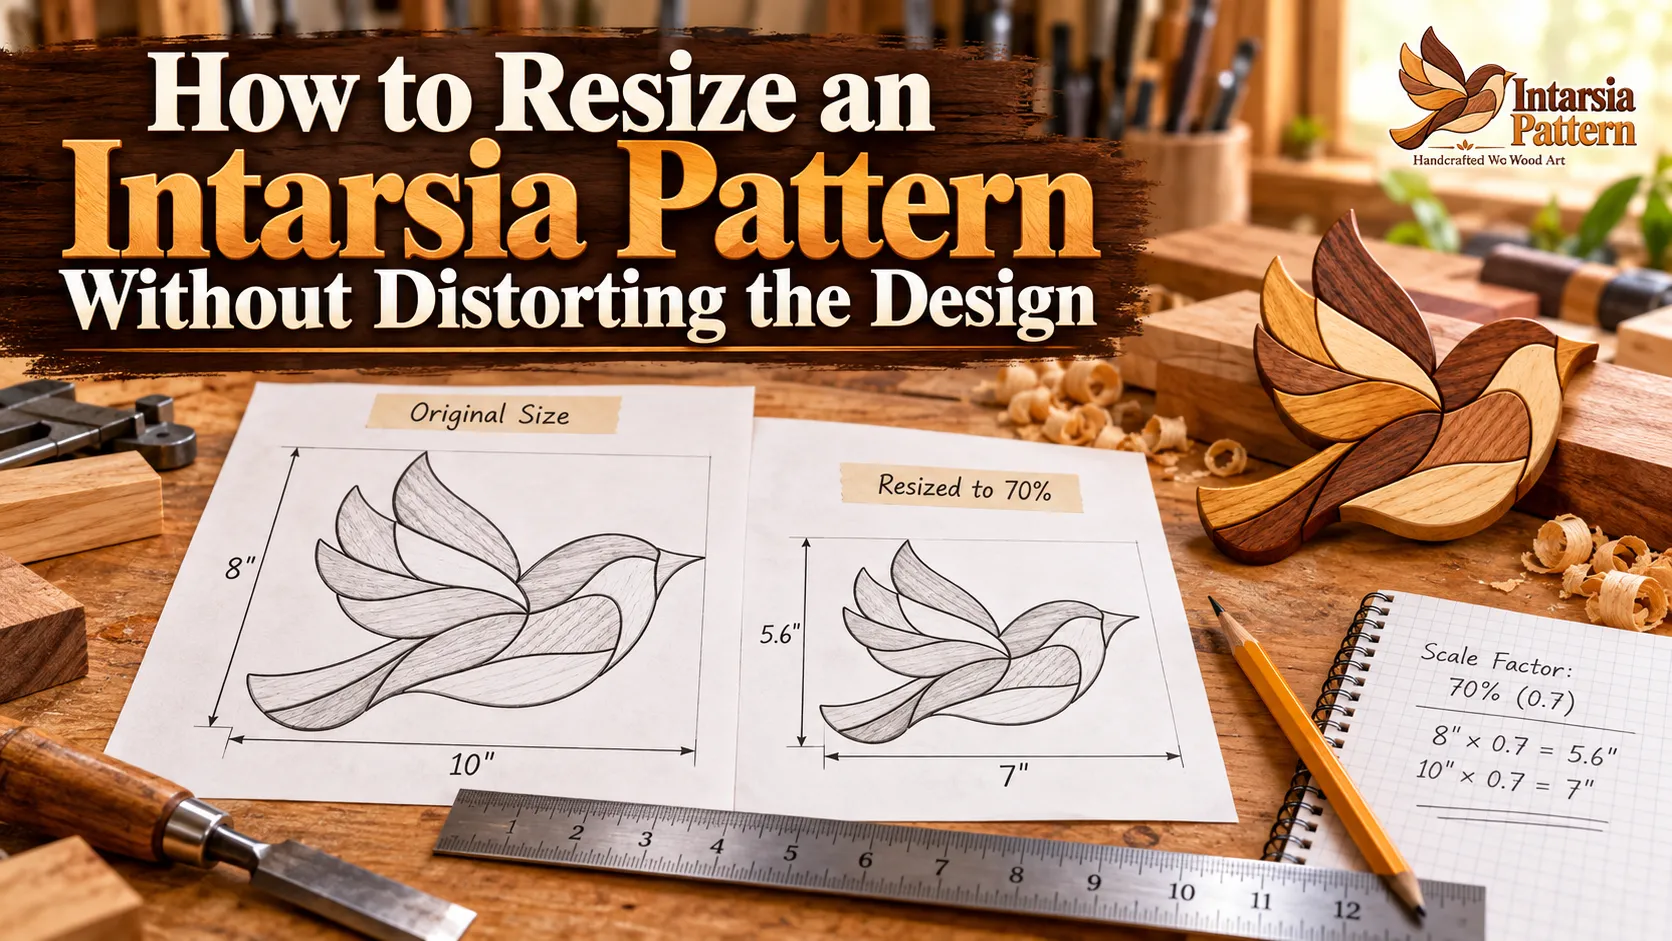
You’ve found the perfect intarsia pattern. Maybe it’s a beautiful wildlife portrait, a Christmas decoration, or a charming wooden bird. There’s just one problem: the design is too large for your wall or too small for the woodworking project you have in mind.
Can you change its size without ruining the design?
Absolutely.
Learning how to resize an intarsia pattern is a useful skill for every scroll saw woodworker. Whether you’re making a small decorative piece or a large statement artwork, the key is keeping every part of the design in proportion.
In this guide, you’ll learn how to enlarge or reduce an intarsia pattern, calculate the correct scaling percentage, print resized PDF templates, and avoid common mistakes that make individual pieces difficult to cut or assemble.
Let’s make sure your next woodworking project is exactly the size you want.
How to Resize an Intarsia Pattern: Quick Answer
To resize an intarsia pattern without distortion, divide your desired finished size by the original pattern size and multiply by 100.
Use this formula:
New Size ÷ Original Size × 100 = Scale Percentage
For example, if your original design is 18 inches wide and you want it to measure 24 inches:
24 ÷ 18 × 100 = 133.3%
Print the complete pattern at approximately 133.3% of its original size.
Always apply the same scaling percentage to both the width and height. This preserves the proportions of every piece.
Before cutting any wood, print a test section and verify the dimensions with a ruler.
Why Correct Intarsia Pattern Resizing Matters
Intarsia woodworking is different from simply cutting a decorative silhouette.
A typical intarsia project contains multiple pieces of wood, carefully shaped and arranged to form a complete image.
Some pieces are raised to create depth, while others sit lower to form the background.
If you change the width and height independently, the design can become distorted.
Imagine enlarging a wooden owl pattern. If the body becomes wider but the wings remain their original shape, the owl may look unnatural.
More importantly, the adjoining pieces may no longer match the cutting layout.
Correct proportional resizing helps preserve:
- The original shape and composition.
- Accurate connections between neighboring pieces.
- Natural-looking animal and bird proportions.
- Consistent pattern lines and assembly references.
- The intended balance between large and small details.
If you’re just getting started, our Intarsia for Beginners guide explains the basic tools, materials, and techniques used to create dimensional wood art.
The Simple Formula to Resize an Intarsia Pattern
You don’t need advanced design software to calculate pattern enlargement or reduction.
All you need is the original dimension, your desired dimension, and a calculator.
How to Enlarge an Intarsia Pattern
Suppose you have a wooden fox pattern that measures 18 inches wide.
You want to create a larger wall decoration measuring 27 inches wide.
Here’s the calculation:
27 ÷ 18 × 100 = 150%
Your new print scale is 150%.
If the original pattern is 12 inches tall, the new height becomes:
12 × 1.5 = 18 inches
Your original 18 × 12-inch pattern becomes 27 × 18 inches.
The design is larger, but its proportions remain unchanged.
How to Reduce an Intarsia Pattern
Now imagine your original design is 24 inches tall, but you only have room for a 16-inch decoration.
The calculation is:
16 ÷ 24 × 100 = 66.7%
Print the pattern at approximately 66.7%.
A 24-inch design becomes 16 inches tall.
However, remember that every small detail is also reduced.
Tiny bird beaks, leaf tips, animal ears, or narrow branches may become much harder to cut.
Intarsia Pattern Resize Percentage Chart
Use this chart when planning common pattern sizes.
| Original size | Desired size | Print scale |
|---|---|---|
| 12 inches | 18 inches | 150% |
| 16 inches | 20 inches | 125% |
| 18 inches | 12 inches | 66.7% |
| 18 inches | 24 inches | 133.3% |
| 20 inches | 15 inches | 75% |
| 20 inches | 30 inches | 150% |
| 24 inches | 18 inches | 75% |
| 24 inches | 36 inches | 150% |
These percentages apply to the original full-size master pattern.
If you’re working from a reduced illustration, first establish its actual scale before using the chart.
How to Resize an Intarsia Pattern Without Stretching It
One of the biggest beginner mistakes is resizing the width and height separately.
A proper intarsia pattern should maintain its original aspect ratio.
What Is Aspect Ratio?
Aspect ratio describes the relationship between a design’s width and height.
For example, a pattern measuring 20 inches wide and 10 inches tall has a 2:1 aspect ratio.
If you enlarge it to 30 inches wide, the correct height is 15 inches.
Changing it to 30 × 20 inches would stretch the design vertically.
This can make animals, faces, flowers, and other natural shapes look strange.
What if Your Wall Has a Different Shape?
Let’s say your original pattern measures 24 × 18 inches.
You want to place it in an area that is no larger than 20 × 16 inches.
You must calculate the scaling percentage for both dimensions.
Width:
20 ÷ 24 × 100 = 83.3%
Height:
16 ÷ 18 × 100 = 88.9%
Choose the smaller percentage, 83.3%, so the design fits within both limits.
The resulting pattern will measure approximately 20 × 15 inches.
You will have a little unused space above or below the design, but its proportions will remain correct.
That’s much better than stretching the artwork to fill every inch.
How to Resize an Intarsia Pattern PDF
A properly prepared PDF is often the easiest file format to resize because its page dimensions can be controlled during printing.
Adobe Acrobat Reader provides scaling options that allow you to enlarge or reduce a pattern by a specified percentage.
Step 1: Open the Original Cutting PDF
Download the digital intarsia pattern to your computer.
Open the full-size cutting file in Adobe Acrobat Reader.
Before resizing, check whether the file contains a true-size master pattern, pre-tiled pages, or only a reduced reference drawing.
A finished-project photograph is not a substitute for a precise cutting template.
Step 2: Choose Your Target Size
Measure the space where you plan to display the finished project.
Decide on the desired width or height, then calculate the new scaling percentage.
Write down the result before opening the print settings.
Step 3: Select the Correct Print Scale
Open File → Print.
Under Page Sizing & Handling, choose the appropriate scaling option.
For a pattern that fits on the selected paper, Custom Scale allows you to enter an enlargement or reduction percentage.
For example:
- 75% makes the pattern smaller.
- 100% preserves the current size.
- 125% enlarges the pattern by one quarter.
- 150% makes each linear dimension 1.5 times the original.
Avoid Fit to Page when accurate physical dimensions are important.
Step 4: Check the Print Preview
Inspect the design before printing.
Check that no essential pieces have been cropped.
If the enlarged pattern no longer fits on one sheet, you’ll need tiled printing or larger paper.
Step 5: Print and Measure a Test Section
Print a page containing a known reference measurement.
Use a ruler to compare the result against the expected resized dimension.
For example, a 2-inch calibration line enlarged to 150% should measure 3 inches.
Once the test is correct, continue with the full pattern.
How to Resize a Large Intarsia Pattern Using Tiled Printing
Larger wildlife and decorative patterns often exceed the size of ordinary printer paper.
Fortunately, you don’t need an industrial printer.
Tiled printing lets you divide a large drawing across several sheets.
Using Poster Mode to Enlarge an Intarsia Pattern
In Adobe Acrobat Reader:
- Open the full-size master PDF.
- Select File → Print.
- Choose Poster under Page Sizing & Handling.
- Enter the required Tile Scale percentage.
- Set a small overlap, such as 0.25 inches.
- Enable cut marks and labels when available.
- Check the page preview.
- Print the sheets.
The sheets can then be joined to create the complete enlarged drawing.
If your pattern is already divided into pre-tiled pages, follow the supplied instructions rather than applying Poster tiling a second time.
How to Join Resized Pattern Pages
Spread the sheets across a flat table.
Start by identifying the matching edges.
Use the printed overlap or registration marks to align each section.
Trim one overlapping margin if necessary, then tape the sheets together.
Check that continuous curves match precisely.
Once the full design is assembled, measure the overall dimensions again.
Why Resized Intarsia Pattern Pages Sometimes Don’t Match
Different printing settings can cause individual sheets to come out at inconsistent sizes.
For example, some pages may have been printed at 100% while others used automatic page fitting.
Don’t stretch the paper or force the cutting lines into position.
Reprint the incorrect pages with consistent settings.
If possible, scale the original single-page master design first and then tile that version. This reduces the chance of errors caused by individually resizing already tiled sheets.
Resize an Intarsia Pattern From an Image Without Losing Detail
Not every woodworking pattern arrives as a PDF.
Sometimes you may have a JPG, PNG, scanned drawing, or photograph of a pattern.
These files require additional care.
Choose the Highest-Quality Source
A clear original PNG or high-resolution scan is generally better than a small screenshot.
When a low-resolution image is enlarged, its cutting lines may become blurry or pixelated.
This makes it harder to follow tight curves accurately.
If you have a vector PDF or SVG version of the same design, use that instead when possible.
Keep the Original Proportions Locked
When resizing an image in editing software, enable the option labeled Maintain Aspect Ratio, Lock Proportions, or something similar.
Enter only one target dimension.
Let the software calculate the other dimension automatically.
Avoid stretching the image to fill a page.
Be Careful With Photographed Patterns
A photograph taken at an angle can introduce perspective distortion.
One side of the design may appear wider than the other.
Enlarging that image will preserve the distortion.
For accurate cutting, use a flat scan or properly prepared master drawing rather than an angled photograph.
Check Line Quality Before Printing
Zoom into the smallest pattern details.
Inspect narrow curves, small eyes, leaf tips, and overlapping parts.
If the lines are unclear, resolve the source-image problem before scaling.
Printing a fuzzy design at a larger size doesn’t automatically make its lines more accurate.
How Resizing an Intarsia Pattern Affects Woodworking Difficulty
Changing the size of a pattern also changes how it behaves in the workshop.
A design that is easy at 20 inches may become much more challenging at 10 inches.
Smaller Intarsia Patterns Need More Precision
Reducing an intarsia pattern makes every component smaller.
Large sections may remain easy to cut, but small decorative details can become fragile.
Pay particular attention to:
- Bird beaks, feet, and feather tips.
- Thin branches and narrow animal tails.
- Small eyes and facial features.
- Pointed leaves and flower petals.
- Narrow connecting sections.
- Delicate ornament details.
For beginners, it’s usually better to keep enough size for the smallest pieces to be handled and shaped comfortably.
Larger Patterns Need Better Material Planning
Enlarging a woodworking pattern generally gives you more room for cutting and shaping.
However, it also requires larger pieces of wood and a suitable backing board.
Before increasing the size significantly, consider whether your available wood blanks can accommodate the design.
You may also need to adjust your cutting sequence and support larger sections more carefully.
Does Wood Thickness Need to Change?
Not automatically.
Pattern scaling changes the width and height of the design, but wood thickness should be chosen according to the finished relief, piece size, strength, and intended appearance.
For a smaller version, excessively thick stock can make the final artwork look bulky.
For a larger version, additional thickness may allow smoother shaping and stronger depth.
However, using wood twice as thick simply because the pattern is enlarged to 200% is not always necessary.
How to Resize an Intarsia Pattern While Preserving Grain Direction
Wood grain is a major part of what makes intarsia attractive.
It adds movement, color variation, and natural texture without relying entirely on paint.
When resizing your design, keep the grain-direction information.
For example, a bird wing may look more natural when the grain follows the direction of the feathers.
Likewise, a curved animal tail may benefit from grain that follows its movement.
The same principle applies to leaves, tree branches, hair, and flowing decorative shapes.
Learn more about the technique in our What Is Intarsia guide.
Keep the Original Master Pattern
Don’t discard your original file after resizing.
You may need to compare piece labels, grain arrows, or assembly references later.
Keep a clean master copy alongside the resized cutting templates.
This makes the cutting and assembly stages easier to organize.
Common Mistakes When You Resize an Intarsia Pattern
| Mistake | What happens | Better approach |
|---|---|---|
| Stretching only the width | Shapes look unnaturally wide | Preserve the original aspect ratio |
| Using Fit to Page | Print dimensions may change | Use the required percentage |
| Resizing individual pieces differently | Pieces may not fit together | Scale the complete design uniformly |
| Enlarging a blurry screenshot | Cutting lines lose clarity | Use the original high-quality file |
| Reducing too much | Thin parts become fragile | Choose a more practical finished size |
| Forgetting to measure the test print | Size errors remain unnoticed | Verify a known dimension |
| Mixing paper settings | Tiled pages may not align | Use consistent print settings |
| Ignoring wood thickness | Relief can look unbalanced | Adjust depth separately from width and height |
Practical Intarsia Pattern Resizing Examples
Let’s look at three situations you might encounter.
Example 1: Enlarging a Wildlife Pattern
Original size: 16 × 12 inches.
Desired width: 24 inches.
Scale: 24 ÷ 16 × 100 = 150%.
New dimensions: 24 × 18 inches.
This creates a larger wildlife portrait without changing the proportions.
Example 2: Reducing a Christmas Decoration
Original size: 20 × 18 inches.
Desired height: 15 inches.
Scale: 15 ÷ 18 × 100 = 83.3%.
New width: approximately 16.7 inches.
This may make the design better suited to a smaller holiday wall display.
Check the smallest ornaments, holly leaves, or decorative details before committing to the reduced size.
Example 3: Making a Large Bird Intarsia Pattern
Original size: 12 × 10 inches.
Desired width: 30 inches.
Scale: 30 ÷ 12 × 100 = 250%.
New height: 25 inches.
This is a substantial enlargement.
Before printing, make sure the design remains clear and the planned backing board, wood stock, and hanging hardware are appropriate for the increased size.
Frequently Asked Questions About Intarsia Pattern Resizing
Can I Resize an Intarsia Pattern to Any Size?
You can scale many patterns proportionally, but not every finished size is practical. Extremely small versions may contain fragile details, while large versions may need stronger backing boards and more suitable wood stock.
What Is the Best Way to Resize Intarsia Pattern PDF Files?
Use the original full-size PDF and calculate the required scale percentage. In Adobe Acrobat Reader, use Custom Scale or Poster printing as appropriate. Check the printed dimensions before cutting.
Will Enlarging an Intarsia Pattern Change Its Shape?
Not if both width and height are enlarged by the same percentage. The proportions remain unchanged when the original design is scaled uniformly.
Can I Reduce an Intarsia Pattern by 50%?
Yes. A 20-inch design becomes 10 inches along the same dimension. However, fine details will also become half their original linear size, so evaluate whether they remain practical to cut.
How Do I Resize an Intarsia Pattern From 18 Inches to 24 Inches?
Divide 24 by 18 and multiply by 100. The result is approximately 133.3%. Use this percentage to enlarge the complete master design.
Should I Resize Each Intarsia Piece Separately?
No. Resize the entire master pattern as one design. This keeps adjoining cutting lines and individual pieces aligned.
Does Resizing an Intarsia Pattern Affect the Number of Pieces?
Proportional scaling does not change the number of pattern pieces. However, very small versions may require deliberate simplification of delicate details, which would be a design modification rather than simple resizing.
How Can I Tell if My Resized Pattern Is Accurate?
Measure at least one known horizontal dimension and one vertical dimension after printing. Also check that the complete tiled pattern aligns correctly and retains its original proportions.
Final Checklist Before Cutting Your Resized Pattern
Before transferring the design to wood, confirm that:
- The original master pattern is saved.
- The desired finished dimensions are clearly defined.
- The scaling percentage is calculated correctly.
- Width and height remain proportional.
- Every cutting template uses the same scale.
- The smallest pieces are practical to cut safely.
- All cutting lines and grain arrows remain readable.
- Tiled pages are joined accurately.
- The printed dimensions have been checked with a ruler.
- Wood thickness, backing board size, and assembly depth have been considered.
Once these checks are complete, you can begin preparing your wood with much more confidence.
Final Thoughts: Resize an Intarsia Pattern With Confidence
Resizing a woodworking pattern doesn’t have to be complicated.
The secret is using one accurate percentage for the entire design, preserving the original proportions, and checking the printed dimensions before cutting.
Whether you’re reducing a Christmas ornament or enlarging a detailed animal portrait, proper scaling helps you keep the artwork balanced and the wooden pieces aligned.
Take a little extra time to prepare the pattern. It can save you wasted materials, frustrating gaps, and unnecessary recutting later.
Looking for your next project? Explore the collection of digital intarsia patterns at IntarsiaPattern, including wildlife, birds, animals, nature-inspired designs, and seasonal woodworking projects.
Choose a design you love, size it for your space, and enjoy turning your ideas into beautiful dimensional wood art.

Zaid Hussain
Articles from IntarsiaPattern focus on intarsia woodworking, scroll saw techniques, digital patterns and practical project guidance.


Comments 0
Have a question or something useful to add? Share it below.