
What makes a wooden eagle look realistic, a fox portrait feel alive, or a hummingbird stand out against a bright flower?
It isn’t just the pattern or the precision of the scroll saw.
Much of the magic comes from choosing the right wood.
The best wood for intarsia brings together natural colors, interesting grain patterns, suitable hardness, and enough contrast to make every part of the design visible.
A single piece of walnut can create a deep shadow. Pale maple can brighten a bird’s chest. Cherry can add warmth to animal fur, while carefully selected cedar can introduce several shades into one project.
But choosing wood isn’t always easy.
Should you use hardwood or softwood? Does every piece need a different species? Will the colors change after finishing? What should you buy if you’re just starting?
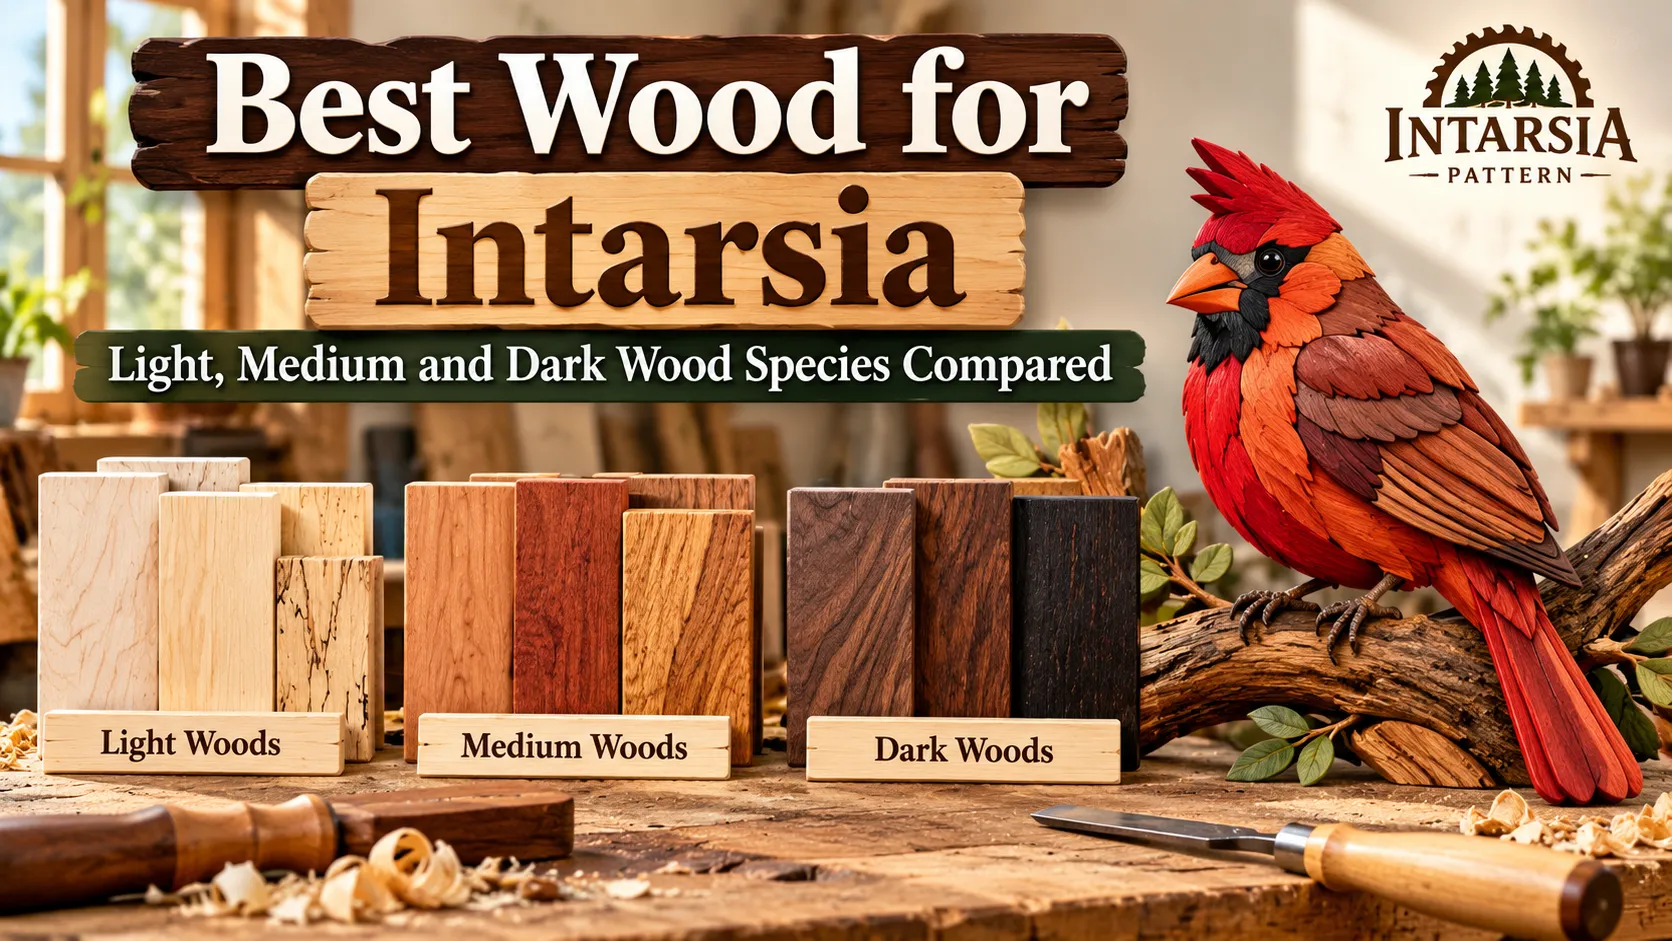
This guide answers those questions with practical comparisons of light, medium, and dark wood species.
You’ll also learn how to combine wood colors, choose grain direction, avoid common mistakes, and build a useful beginner wood collection without buying expensive exotic lumber.
What Is the Best Wood for Intarsia?
The best wood for intarsia is wood that provides the right color, grain direction, strength, and workability for each part of your design.
There is no single species that works perfectly for every project.
Instead, most woodworkers combine several shades of wood to create contrast and dimensional detail.
For beginners, a practical starting combination is:
- Hard maple for light-colored sections.
- Cherry for warm medium-toned sections.
- Black walnut for dark areas and shadows.
This combination can work beautifully for animals, birds, landscapes, and many other woodworking projects.
However, the wood’s actual appearance matters more than the name printed on the board.
A light-colored section of cherry might work as a medium shade in one project but appear comparatively dark beside pale maple.
That is why learning to recognize wood tones is an essential intarsia skill.
If you’re new to this craft, begin with our Intarsia for Beginners guide.
Why Wood Selection Matters in an Intarsia Pattern
An intarsia pattern is made from separate pieces of wood that fit together to create an image.
Each piece contributes something different.
Some sections establish the background. Others form shadows, facial features, feathers, flower petals, or raised details.
The choice of wood determines how clearly those elements appear.
Imagine creating a golden retriever portrait.
If the entire dog is made from pieces with nearly identical colors, its ears, face, nose, and chest may blend together.
If you use a mixture of pale cream, warm golden brown, medium amber, and dark walnut, the dog’s features become easier to recognize.
The same principle applies to an owl, wolf, eagle, rabbit, or seasonal design.
Wood color provides contrast. Grain creates visual direction. Surface shaping adds dimension.
When these features work together, the finished artwork becomes more expressive.
Three Things to Consider Before Choosing Wood
Start by asking three questions.
- Is the wood light, medium, or dark enough for the intended section?
- Does its grain direction support the shape and visual movement?
- Can it be safely cut, shaped, and assembled at the size required?
A board may have the perfect color but contain knots that make it unsuitable for a narrow feather tip.
Another board may cut beautifully but have such busy grain that it distracts from the subject.
Choosing well means considering all three factors together.
Light Wood Species for Intarsia
Light woods are useful for highlights, snow, white feathers, animal faces, flower petals, and other bright areas.
They provide separation between darker components and help important details stand out.
1. Aspen — Soft White Wood for Beginners
Aspen is a useful choice when you need pale, relatively uniform wood.
Its subtle grain and light appearance make it suitable for snow, white birds, animal chests, and bright background details.
Aspen is generally easy to cut, which can make it approachable for beginners.
However, because it is soft, careless sanding can round over edges or leave fuzzy surfaces.
Use sharp blades and gentle sanding pressure.
Best uses: Snow scenes, light animal fur, white feathers, winter decorations, and pale accents.
2. Hard Maple — Strong Cream-Colored Wood
Hard maple offers a pale cream appearance with a fine, generally even texture.
It is an excellent option for clean-looking highlights and sections that need more strength than very soft woods.
Maple works especially well for large light-colored feathers, animal faces, bright petals, and selected structural details.
Because it is relatively hard, it requires more patience during cutting and shaping.
A dull blade or excessive feed pressure can contribute to burning and rough cuts.
Best uses: Bird feathers, animal faces, light-colored flowers, snow, and detailed highlights.
3. Holly — Bright White Wood for Fine Details
Holly is valued for its very pale, sometimes almost white appearance and fine texture.
It can create striking contrast when placed beside walnut or other dark woods.
This makes it especially attractive for small eye details, white feather markings, teeth, and tiny highlights.
However, good-quality holly can be harder to find, and some boards may contain knots or discoloration.
It is best reserved for details where its appearance makes a meaningful difference.
Best uses: White accents, eye details, teeth, light feather sections, and fine decorative features.
4. Basswood — Easy-to-Shape Pale Wood
Basswood is a soft, fine-textured hardwood commonly appreciated for carving and shaping.
Its pale color makes it suitable for practice projects, light backgrounds, and simple decorative components.
Because it removes easily under sanding tools, beginners should avoid excessive pressure.
Very thin pieces may also be vulnerable to damage.
Best uses: Practice projects, light floral details, decorative backgrounds, and gentle surface contours.
Best Light Woods Compared
| Wood | Typical Appearance | Workability | Best Application |
|---|---|---|---|
| Aspen | Pale white to cream | Easy, but soft | Snow and light feathers |
| Hard Maple | Cream to pale gold | More demanding | Strong detailed pieces |
| Holly | Very pale white | Moderate | High-contrast small details |
| Basswood | Light cream | Easy to shape | Practice and simple contours |
| Yellow Poplar | Cream with possible green or gray streaks | Easy, may become fuzzy | Larger light or colored sections |
The actual colors vary between boards and may change with age or finishing.
Medium Wood Species for Intarsia
Medium-toned wood forms the heart of many intarsia designs.
These species bridge the gap between pale highlights and dark shadows.
They are particularly useful for animal fur, wooden branches, rocks, feathers, buildings, and nature scenes.
1. Cherry — Warm Wood for Animal Patterns
Cherry is one of the most versatile choices for warm-toned intarsia projects.
Its color often begins as a lighter pinkish brown and gradually deepens into a richer reddish brown.
The fine texture and attractive grain make it suitable for smooth contours.
Cherry works especially well for animal portraits where warm colors help create natural-looking fur.
It can also provide an attractive contrast against maple and walnut.
Best uses: Dogs, foxes, horses, rabbits, warm bird feathers, and natural decorative elements.
2. Alder — A Practical Medium-Tone Alternative
Alder usually provides warm tan to reddish-brown tones.
It is generally easier to work than many harder hardwoods and can be a useful choice for beginner and intermediate projects.
Its relatively subtle grain allows the shape of the component to remain the visual focus.
Alder can be especially helpful when you want medium-toned areas without dramatic grain patterns.
Best uses: Animal bodies, faces, medium-colored feathers, and simple nature designs.
3. Western Red Cedar — Multiple Natural Shades
Western red cedar can offer a wide range of reddish, pinkish, and brown shades.
A single board may contain light and dark variations that are useful for intarsia.
It can be especially attractive for wildlife portraits, rustic landscapes, and organic textures.
However, western red cedar is soft and can dent or sand unevenly.
Its dust is also associated with respiratory sensitization, so effective dust collection and appropriate protection are particularly important.
Best uses: Wildlife patterns, rustic scenery, warm shadows, and decorative backgrounds.
4. Oak — Strong Grain for Natural Textures
Oak has a more visible grain structure than many other woods in this guide.
Its grain can add character to landscapes, tree trunks, rocks, rustic buildings, and other natural subjects.
However, large grain patterns may be distracting in very small or delicate facial pieces.
Oak is also harder to shape than softwoods such as cedar or basswood.
Use it where the grain contributes to the design rather than overpowering it.
Best uses: Trees, branches, rustic scenes, textured backgrounds, and larger decorative sections.
Medium Wood Comparison Table
| Wood | Typical Color | Grain Character | Best Use |
|---|---|---|---|
| Cherry | Warm pinkish to reddish brown | Fine and smooth | Animal fur and feathers |
| Alder | Light tan to reddish brown | Fairly subtle | Warm mid-tone sections |
| Western Red Cedar | Reddish to medium brown | Distinctive bands | Wildlife and rustic scenes |
| Oak | Tan to medium brown | Prominent | Trees, rocks, and texture |
| Beech | Pale pinkish tan | Fine and even | Smooth medium-tone components |
If you are unsure which medium wood to choose, start by comparing your actual boards beside the light and dark pieces.
A species that looks perfect by itself may not provide enough contrast within the complete pattern.
Dark Wood Species for Intarsia
Dark woods help create strong outlines, natural shadows, eyes, noses, animal markings, and dramatic contrast.
A small amount of dark wood can have a major effect on the finished design.
1. Black Walnut — Excellent for Dark Contrast
Black walnut is one of the most useful dark woods for intarsia.
Its heartwood ranges from medium brown to rich chocolate brown, sometimes with darker streaks.
Walnut generally works well with cutting, shaping, gluing, and finishing when the grain is reasonably straight.
It is useful for animal noses, bird wing shadows, dark fur, branches, and other areas requiring depth.
Because walnut can be relatively expensive, reserve it for parts where its darker tone adds value.
Best uses: Eyes, noses, dark feathers, tree branches, animal markings, and shadows.
2. Wenge — Very Dark Wood With Strong Texture
Wenge offers very dark brown tones and a bold grain appearance.
It can create excellent contrast in small decorative sections.
However, it is not usually a beginner-friendly choice.
It can splinter, and its coarse grain may make tiny details difficult to produce.
Use suitable dust control, careful handling, and appropriate tooling.
Best uses: Dark accents, bold shadows, larger contrasting details, and advanced projects.
3. Ebony — Almost Black Details
Some ebony species offer very dark heartwood that can appear nearly black.
This makes ebony useful for tiny details that need strong contrast.
Examples include pupils, small markings, and decorative accents.
However, genuine ebony can be expensive, difficult to source responsibly, and demanding to work.
For many projects, carefully selected dark walnut or another suitable dark material is sufficient.
Best uses: Small eye details, dark accents, and high-contrast features.
Best Dark Woods Compared
| Wood | Typical Appearance | Difficulty | Best Application |
|---|---|---|---|
| Black Walnut | Medium to deep chocolate brown | Moderate | Most dark pattern sections |
| Wenge | Very dark brown | Higher | Strong texture and dark accents |
| Ebony | Deep brown to nearly black, depending on species | Higher | Tiny high-contrast details |
| Dark Western Red Cedar | Dark reddish brown | Easy to cut, delicate to sand | Rustic shadows and wildlife |
For most beginners, black walnut is the more practical starting point.
Best Wood for Intarsia: Complete Species Comparison
This table provides a quick overview when planning a new woodworking project.
| Wood Species | Color Group | Cutting & Shaping | Recommended Uses |
|---|---|---|---|
| Aspen | Light | Easy, soft | Snow, white feathers |
| Hard Maple | Light | Moderate to demanding | Highlights, detailed pieces |
| Holly | Light | Moderate | Small white accents |
| Basswood | Light | Easy | Beginner practice, pale sections |
| Yellow Poplar | Light to medium | Easy, sometimes fuzzy | Backgrounds, leaves |
| Alder | Medium | Relatively easy | Warm fur, feathers |
| Cherry | Medium | Moderate | Animals, natural wood tones |
| Oak | Medium | More demanding | Rustic texture, branches |
| Western Red Cedar | Light to dark reddish brown | Easy to cut, easily dented | Wildlife, landscapes |
| Black Walnut | Medium-dark to dark | Moderate | Shadows, noses, dark feathers |
| Wenge | Very dark | Challenging | Bold accents |
| Ebony | Very dark | Challenging | Small dramatic details |
Treat these colors as approximate categories, not fixed rules. Different boards, growth conditions, sapwood and heartwood sections, finishes, and lighting can change the appearance considerably.
How to Combine Light, Medium and Dark Wood in an Intarsia Pattern
Selecting individual species is only the beginning.
The next challenge is making the colors work together.
A good intarsia pattern needs enough contrast to separate important shapes without making the overall design look disjointed.
Step 1: Identify the Lightest and Darkest Areas
Study your finished reference image.
Locate the brightest highlights and deepest shadows.
These two areas establish the boundaries of your color palette.
For an owl, the pale face markings may be the lightest sections, while the dark pupils and selected feathers provide the deepest shadows.
Step 2: Choose Medium Shades
Now select woods that connect the two extremes.
You might use pale maple, light cherry, darker cherry, and walnut.
This creates gradual transitions rather than sudden color changes everywhere.
Step 3: Use a Grayscale Test
Here is a simple trick.
Arrange small wood samples beside one another and take a photograph.
Convert the photograph to black and white.
Without color distracting you, it becomes easier to see whether neighboring woods are actually different in brightness.
Two species may look different because one is red and the other is green, yet appear almost identical in grayscale.
If those pieces represent separate facial features, the design may need stronger value contrast.
Step 4: Check the Samples Under Your Intended Finish
Finishes frequently deepen wood color and make grain more noticeable.
Apply your intended finish to sample offcuts.
Wait until the samples are dry according to the product instructions.
Then compare them again.
The result may be quite different from the raw wood.
Step 5: Arrange the Pieces Before Gluing
Once the components have been cut and shaped, perform a complete dry fit.
Look at the design from a normal viewing distance.
Check whether the subject is easy to recognize.
If one area appears muddy or lacks separation, consider changing a wood piece before final assembly.
Best Wood for Intarsia if You’re a Beginner
You do not need twelve expensive wood species for your first project.
Three carefully selected boards can teach you most of the basic principles of wood color and contrast.
The Three-Wood Beginner Palette
A useful combination is:
- Hard maple for light highlights.
- Cherry for warm medium areas.
- Black walnut for darker outlines and shadows.
This palette can work for many small animal and bird designs.
If maple is difficult to cut with your equipment, suitable aspen may be a practical alternative for some light sections.
If walnut is outside your budget, compare darker cedar pieces or responsibly sourced dark offcuts.
The goal is to create a balanced range of values while keeping the project affordable.
Best Wood for Intarsia on a Small Budget
Begin with small offcuts rather than full-sized boards.
Ask a local lumber supplier about hardwood sample packs or clean workshop offcuts.
Choose boards that are already dry and reasonably flat.
Try to obtain three noticeably different tones.
You can add more species as your skills develop.
A thoughtful three-wood design is often more attractive than a poorly planned project using ten exotic woods.
Which Wood Should You Choose for Different Intarsia Projects?
Different subjects benefit from different palettes.
Here are four practical examples.
Animal Intarsia Patterns
For a golden retriever, consider pale maple or aspen for highlights, cherry and alder for warm fur, and walnut for darker facial features.
For a wolf, use pale cream pieces beside medium brown and dark walnut.
For a fox, combine warm reddish wood, cream highlights, and dark ears or facial markings.
The contrast should help distinguish the animal’s features without creating unnatural stripes.
Bird Intarsia Patterns
Bird designs rely heavily on feather colors and grain direction.
For a bald eagle, pale maple or aspen can create the head and tail, while walnut and warm brown species provide wing contrast.
For a great horned owl, use multiple cream, amber, tan, and dark-brown shades to separate the face, chest, and wing feathers.
For a hummingbird, natural tan and brown feathers can be combined with carefully colored green and red accents.
Visit the IntarsiaPattern Shop to explore bird and wildlife designs for inspiration.
Flower and Botanical Intarsia Patterns
Leaves may benefit from selected poplar with naturally greenish tones or appropriately colored pale wood.
Cherry can work well for warm-toned petals.
Light maple may provide clean flower highlights.
Yellowheart can add golden accents, although color changes and workability should be considered.
For vivid red, blue, or green details, carefully applied dyes or stains may offer more predictable results than searching for exotic wood.
Landscape Intarsia Patterns
Landscape designs often use broader areas of color and texture.
Light maple or aspen can represent snow.
Oak can suggest rough tree bark or textured natural surfaces.
Walnut can create strong foreground silhouettes.
Cedar may provide warm mountains, cabins, or rustic backgrounds.
The ideal wood depends on the landscape’s mood and the contrast between foreground and background.
Why Grain Direction Matters as Much as Wood Color
Wood grain is a visual tool.
It can suggest movement, texture, and the natural direction of an object.
Consider a bird’s wing.
When the grain runs along the feathers, those pieces often appear more natural.
When the grain cuts across narrow feather tips, the result may look less convincing and be structurally weaker.
For animal fur, grain direction can follow the body or facial contours.
For leaves, align the grain with the main vein where practical.
For branches and tree trunks, follow their general length.
Planning grain direction before cutting helps avoid unnecessary mistakes.
Avoid Short Grain in Delicate Pieces
Short grain occurs when wood fibers run across a narrow section rather than along its length.
This can create weak tips.
Small beaks, thin branches, narrow feather sections, and delicate leaves are especially vulnerable.
Rotate the paper template on the board when possible so the grain supports the piece.
If a particularly delicate shape cannot be cut safely from your chosen board, consider changing the wood or using a different construction approach.
Wood Thickness: How Much Do You Need?
Many dimensional intarsia projects use stock around 3/4 inch (19 mm) thick.
This provides room for shaping and surface relief.
However, thickness is not universal.
Simple decorative designs may use thinner stock, while larger wildlife pieces may require thicker components.
The correct thickness depends on the intended relief, piece size, structural strength, and pattern instructions.
If you mix different thicknesses, plan the final elevations carefully.
A thin piece can sometimes be raised with a suitable backing spacer, while a thick piece may require additional shaping.
Always follow the specific pattern’s material recommendations when available.
Do Wood Colors Change Over Time?
Yes. Many wood species change color as they age or are exposed to light.
Cherry often darkens from pinkish-brown toward a richer reddish-brown tone.
Some purpleheart boards develop strong purple coloration after exposure but can gradually shift toward brown.
Yellow poplar’s greenish or grayish tones may also change.
A clear finish can slow certain changes, but it cannot guarantee permanent color.
This matters when planning an intarsia design that depends on precise color contrast.
How to Reduce Surprises
Make a labeled sample board using small pieces of your chosen species.
Sand the samples to the same final grit.
Apply your intended finish to one half of each sample.
Compare the raw and finished colors.
Keep the board as a reference for future projects.
For particularly colorful woods, research their aging behavior before using them in a major focal area.
Should You Use Natural Wood Colors or Stains?
Natural wood colors are one of the defining attractions of intarsia woodworking.
They allow the grain and character of the wood to become part of the artwork.
However, stains and dyes can also be useful.
A hummingbird with bright green plumage or a red cardinal may be difficult to reproduce using readily available natural wood species alone.
In those cases, suitable color treatments can help.
Use stains selectively rather than covering every piece automatically.
Test the color on scrap wood.
Remember that some woods absorb stains unevenly.
Protect glue surfaces when your assembly method requires clean, unfinished wood for bonding.
The best approach is whichever supports the finished design while retaining attractive wood texture and reliable construction.
How to Buy Wood for Intarsia Projects
When purchasing wood, inspect the board rather than relying only on the species name.
A Practical Wood Buying Checklist
- Choose appropriately dried wood intended for indoor woodworking.
- Check that the board is reasonably flat.
- Avoid major cracks or splits.
- Look for grain suitable for narrow pieces.
- Inspect knots before placing delicate templates.
- Compare several shades under natural light.
- Check whether the thickness matches the pattern.
- Buy a little extra material for mistakes or replacements.
- Consider how the color will change after finishing.
- Prefer responsibly sourced wood when possible.
A moisture meter can be useful, especially when purchasing rough or air-dried lumber.
Wood with unsuitable moisture content may move after cutting or assembly.
When buying unfamiliar or imported species, check their availability, sourcing, and any applicable trade restrictions.
Common Mistakes When Choosing the Best Wood for Intarsia
Mistake 1: Choosing Wood Only by Species Name
Two boards of the same species may look very different.
Compare their actual color and grain before making a decision.
Mistake 2: Using Too Many Similar Shades
If all the wood pieces have almost identical brightness, important features may disappear.
Use a grayscale test to check contrast.
Mistake 3: Ignoring Wood Grain Direction
Grain running across a delicate feather or narrow branch may create weak areas.
Plan the cutting layout carefully.
Mistake 4: Using Very Hard Wood for Every Detail
Hard woods can be beautiful, but extremely dense species may be difficult for beginners to cut and shape.
Use them selectively.
Mistake 5: Sanding Soft Wood Too Aggressively
Aspen, basswood, cedar, and poplar can be damaged by heavy sanding.
Shape gradually and preserve fitting edges.
Mistake 6: Forgetting About the Finish
Some finishes darken light woods or reduce contrast between neighboring pieces.
Test before applying the finish to the completed project.
Mistake 7: Buying More Wood Than Necessary
Beginners do not need large inventories of expensive lumber.
Start with a small, useful range of tones and expand over time.
Best Wood for Intarsia: Frequently Asked Questions
What Is the Best Wood for Intarsia Beginners?
Hard maple, cherry, and black walnut make a useful three-tone starting palette. Aspen can replace maple for some lighter sections when easier cutting is important.
Choose suitable boards rather than relying only on species names.
Is Hardwood or Softwood Better for Intarsia?
Both can work.
Hardwoods often provide stronger detailed pieces and fine surfaces, while some softwoods are easier to cut and offer attractive natural color variations.
The choice depends on the design, wood thickness, and tools.
Can You Use Pine for Intarsia?
Yes, pine can be used for practice and certain decorative sections.
However, knots, prominent growth-ring contrast, softness, and resin can complicate cutting and sanding.
Clear, straight-grained boards are easier to manage.
What Is the Best White Wood for Intarsia?
Aspen and holly are useful for pale or white-looking components. Hard maple is another option when a stronger cream-colored wood is acceptable.
The best choice depends on availability, detail size, and the level of contrast you need.
What Is the Best Dark Wood for Intarsia?
Black walnut is a versatile dark wood for many projects.
Wenge and ebony can provide deeper colors, but they are usually more expensive and challenging.
How Many Wood Species Do You Need?
You can begin with three well-contrasted species.
More detailed patterns may benefit from four or five distinct tones, although several tones can sometimes come from different sections of the same species.
Can You Use Plywood for Intarsia?
Plywood is commonly useful for backing boards.
For visible dimensional pieces, solid wood is generally preferable because the edges and shaped surfaces show natural grain rather than exposed veneer layers.
Should You Finish Wood Before Gluing Intarsia Pieces?
This depends on the assembly method and selected adhesive.
If the glue requires bare wood for a strong bond, keep the appropriate joining surfaces free from finish.
Follow the adhesive and finishing product instructions.
Does Expensive Wood Make Better Intarsia?
Not necessarily.
Accurate cutting, thoughtful wood selection, grain direction, shaping, and finishing often matter more than purchasing expensive exotic species.
A simple maple, cherry, and walnut project can look excellent when the design is planned carefully.
Final Thoughts: Choosing the Right Wood for Your Next Intarsia Pattern
The best wood for intarsia is not always the rarest, darkest, or most expensive species.
It is the wood that helps your design come together.
Light woods create highlights and contrast. Medium woods add warmth and natural transitions. Dark woods define shadows and important details.
But color is only part of the process.
Grain direction, strength, thickness, workability, and finishing all influence the completed artwork.
For your first project, start with a simple palette.
Learn how the woods cut and sand. Observe how their colors look after finishing. Experiment with natural grain direction.
As your skills improve, introduce additional species and more detailed designs.
Every board offers its own grain, color, and character.
With thoughtful selection, even a small collection of wood offcuts can become beautiful dimensional artwork.
Ready to begin your next project?
Explore premium digital intarsia patterns at IntarsiaPattern and discover inspiring animal, bird, wildlife, nature, and seasonal designs.
You can also explore our What Is Intarsia guide and Best Scroll Saw Blades for Intarsia article to develop your woodworking skills further.

Zaid Hussain
Articles from IntarsiaPattern focus on intarsia woodworking, scroll saw techniques, digital patterns and practical project guidance.


Pingback: Intarsia vs Marquetry: What's the Difference (and Which Should You Learn?) - IntarsiaPattern | Intarsia Woodworking & Scroll Saw Patterns
Pingback: How to Finish Intarsia: Sanding, Shaping and Applying the Perfect Finish - IntarsiaPattern | Intarsia Woodworking & Scroll Saw Patterns
Pingback: How to Transfer a Pattern to Wood: 5 Methods Intarsia Makers Actually Use - IntarsiaPattern | Intarsia Woodworking & Scroll Saw Patterns